Start With the Buffer Set Your Meter and Range Call For
Neptune Systems sells pH 4, 7 and 10 calibration standards and gives aquarium-specific examples on the product page: it recommends the 7 and 10 standards for calibrating a probe used in a saltwater aquarium, and the 4 and 7 standards for a freshwater aquarium or a calcium reactor (pH Calibration Solution). Treat those as that maker's examples rather than a rule that applies to every tank of a given type.
Two things decide the pair you actually use. The meter's manual or calibration routine names the required standards and the order it expects; some meters accept two points, others ask for three. Then look at the pH you normally measure. A useful pair puts one standard below that value and one above it, so the probe is checked across the span you rely on. A reef tank running around pH 8.0 to 8.4 falls between 7 and 10. Calcium reactor effluent sits well below 7, which is why 4 and 7 bracket it. Freshwater is not automatically below 7 — some freshwater systems are alkaline — so a tank that normally runs above 7 would sit above a 4 and 7 pair, while 7 and 10 covers that reading.
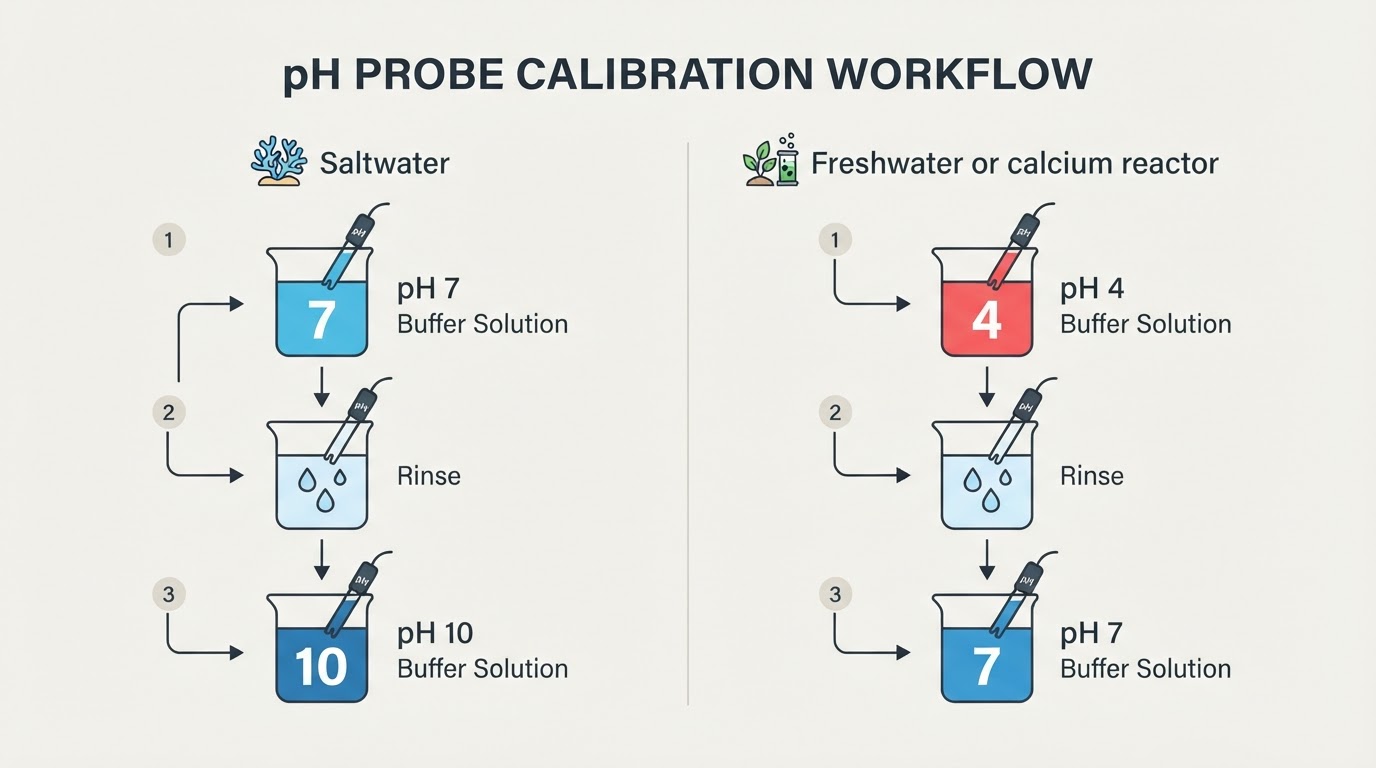
Westlab's electrode-care guide recommends regular multi-point calibration and describes the handling that makes it reliable: rinse with distilled or deionised water between samples, blot gently rather than rubbing the glass, and do not store an electrode in pure water long-term (a guide to caring for pH electrodes).
Keep Each Standard Clean
Contamination is the failure that most often looks like a probe problem. Used buffer carries tank water, rinse water and ions from the previous standard back into the bottle, so pour only the amount you need into a clean cup and keep the probe out of the stock bottle. Never return a used portion to its container, and keep calibration solutions out of the tank: adding standard to the display changes the water you are trying to measure.
Use a fresh portion for each point and a fresh cup for each standard. Cap the bottles when you are done, and set aside any solution that has been open a long time or looks cloudy instead of trusting it as a reference.
Rinse Between Points and Store the Probe Its Maker's Way
Rinsing and storage are separate jobs, and equipment varies enough that the probe's own instructions should govern the storage half. Between points, rinse the electrode with distilled or deionised water. Westlab warns against wiping the glass bulb because static charge can cause erroneous readings; blot the end with lint-free paper instead. Carry the probe from one standard to the next only after that rinse, so the previous buffer does not follow it into the next cup.
The rinse cup is not a storage vessel. Follow the probe maker's instructions for conditioning and storage — most probes ship with a storage bottle or a recommended storage solution, and some need a soak before first use or after sitting dry. What the general guidance settles is the distinction: a hydrated bulb stored as its maker specifies is ready to calibrate, while a bulb left dry or parked in pure water is not, because ions leach out of the glass in pure water.
Follow the Meter's Routine in Order
Every calibration is a conversation with the meter: it names the standard, you present the probe, and it waits for a reading it considers stable. Let the routine finish each step instead of accepting the first number that appears, and follow the order it prompts, including any rinse or confirmation step between buffers. If the meter asks you to hold the probe in the standard for a set time, hold it there; moving the probe during the wait can restart it.
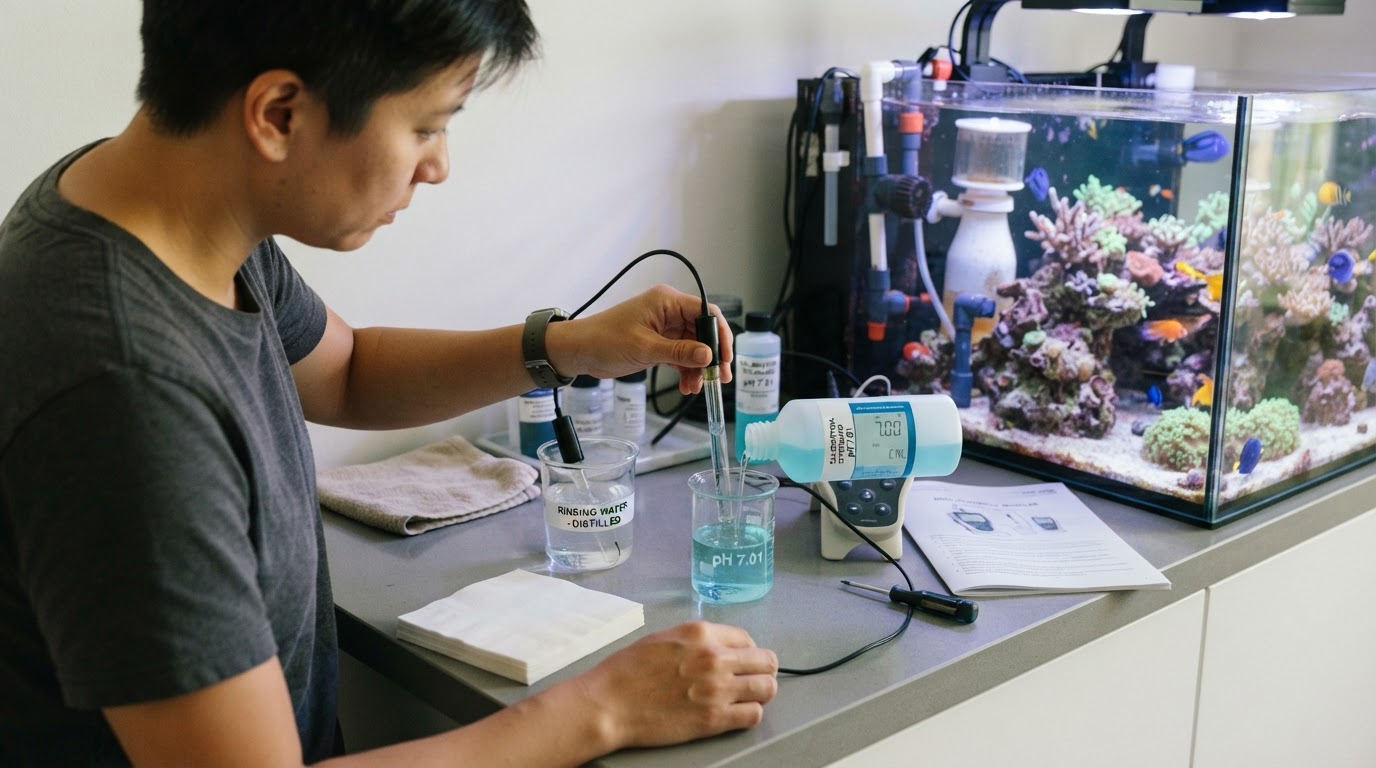
In practice, the run looks like this:
- Set out a clean cup for each standard, a separate cup of distilled or deionised water for rinsing, and lint-free paper for blotting, all at a bench rather than over the display.
- Let the standards reach the temperature conditions named by the meter or solution maker. A buffer's label value is tied to a stated temperature, and standards carried in from a cold garage are not at those conditions yet.
- Check the probe before the first point: the bulb should be wet and the body free of salt creep. A probe that has been sitting dry or crusted gets cleaned and hydrated first, not calibrated as-is.
- Pour a fresh portion, present the probe, and wait for the meter to accept the point. Rinse and blot between points.
- When the routine ends, confirm the result before reading the tank.
Decide Whether the Run Passed
Calibration is complete when the meter has accepted every point it asked for and the probe reads each standard at the value that standard states, within the tolerance the meter's maker specifies. That is a narrower claim than "the display shows the printed number exactly": buffer values are stated at a particular temperature, electrodes drift, and every meter carries its own tolerance. What you are checking is that the probe lands where it should under the conditions the makers describe.
A second look at one standard is the quickest confirmation. Put the probe back into a fresh portion, let the reading settle, and see whether it returns to the same value. A number that keeps sliding in one direction is a reason to repeat the whole run, not to start adjusting the tank on the strength of an unstable calibration.
If the confirmed reading is low, the next step is diagnosis rather than dosing; our guide to low pH in a reef tank covers the causes worth checking once the measurement is trustworthy.
What a Failed Run Actually Tells You
When the routine will not complete, work from the cheapest explanation to the most expensive. A failed run is not automatically a dead probe, and the electrode is not the only remaining suspect once the buffer checks out.
- The buffer. Confirm the pair matches what the meter asked for and the range you expect, then start again with fresh solution. A wrong pair, an old open bottle, or a contaminated portion will all produce a failed run.
- Contamination and handling. Recheck that no used solution went back into a bottle and that each point got its own fresh portion and a rinse in between.
- Hydration and storage. A bulb that has been dry, or one kept in pure water, may need conditioning in the probe maker's storage solution before it behaves like a working electrode.
- The signal path and settings. Check the cable and connector, the input the probe is plugged into, and whether the controller or meter actually saved and recognised the calibration. Temperature belongs here too: a probe without compensation, or a temperature reading that does not match the water, will skew results. A tip that is dirty or coated gets cleaned as its maker directs.
- The electrode. If fresh standards, clean handling and a verified connection still will not complete the routine, repeated failures against known-good buffer point to the electrode rather than another round of tank adjustments.
Until the routine completes, treat the tank readings from that probe as unverified and do not dose pH chemicals on the strength of them. That is not a reason to leave the tank alone: normal husbandry continues, and an emergency — livestock gasping at the surface, a stopped pump, a heater fault — still gets handled while you sort out the measurement.