The setup order is the whole game
A planted tank is a closed system, and every input has to balance against something the tank removes. That is why the stages of a setup are not a checklist you can shuffle. Substrate is fixed the moment the tank is flooded. Lighting decides how fast plants consume carbon and nutrients. Filtration decides how well those inputs reach the leaves and how waste leaves the system. Cycling proves the biological filter can carry livestock before you buy any.
Four stages follow from that, each narrowing the next:
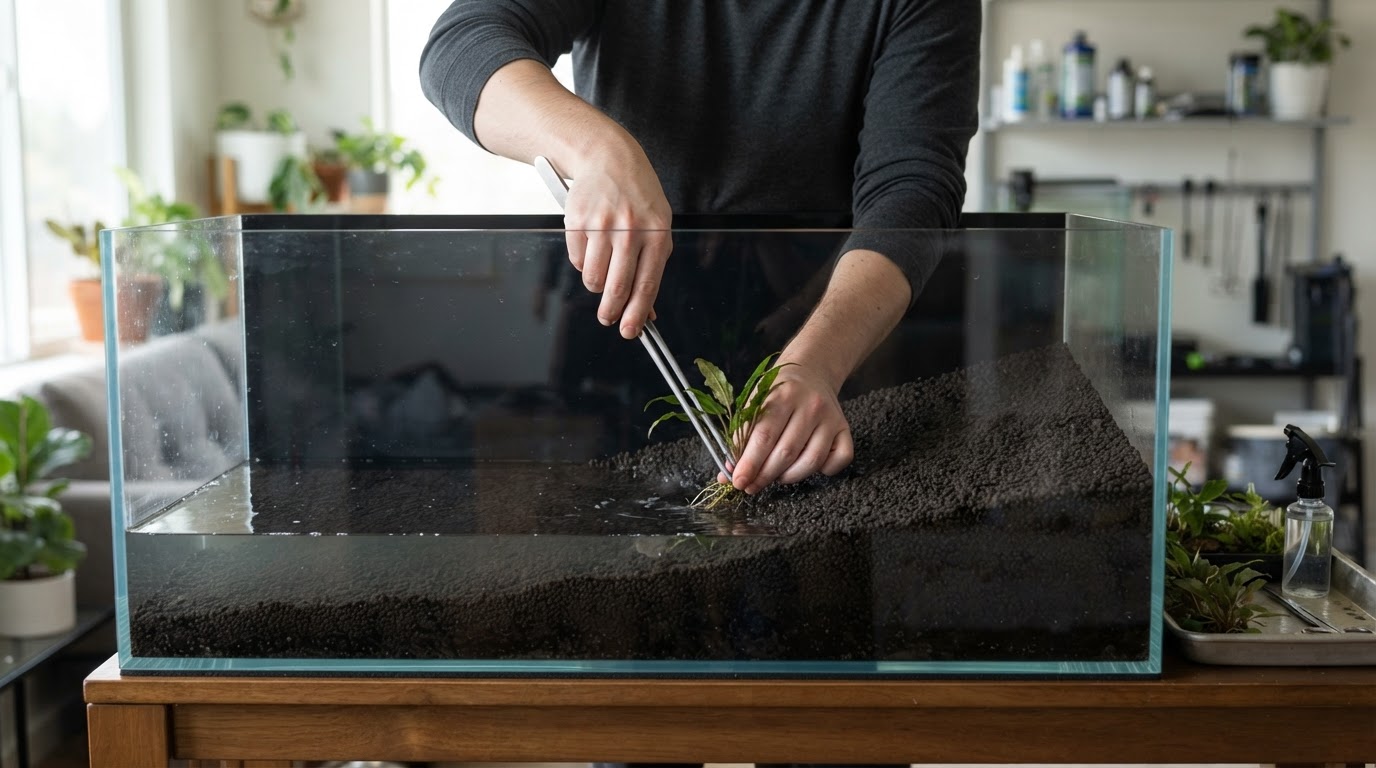
- Substrate goes in first, sloped, before any water.
- Lighting is chosen to match the most demanding plant you plan to keep.
- Filtration and flow are sized to the tank and aimed to reach every corner.
- Cycling and water preparation come last, and livestock waits until they finish.
If you want the full assembly sequence with equipment installation, a complete step-by-step planted aquarium walkthrough covers it. The rest of this article explains the decision behind each stage and the check that tells you it is finished.
Stage 1: Substrate, because it never moves again
Substrate matters more in a planted tank than in a fish-only tank because rooted plants feed through it. There are two classes, and the choice drives your water chemistry and your fertilizer routine.
Inert substrates — washed silica sand, fine gravel, lava sand — anchor plants and nothing else. They never wear out, but root feeders get no nutrients from them, so you push in root tabs and dose the water column.
Active aquasoils such as ADA Aqua Soil Amazonia, Tropica Aquarium Soil, and Fluval Stratum are baked clay granules with a high cation exchange capacity. They release ammonium for the first three to six weeks after flooding, which is the source of the aquasoil ammonia spike, and buffer pH downward by roughly 0.5 to 1.0 units. They feed root-feeding plants for one to three years before the nutrient supply runs out. The trade-offs and the ion chemistry behind them are explained in this guide to the light, substrate, and CO2 decisions.
Two placement rules prevent most substrate problems. Do not rinse an active aquasoil, because you will wash away the fine fraction that does the work. Do rinse inert sand or gravel before it goes in. Do not layer active soil over inert sand without a separator, because the finer soil works its way down within months.
Depth is where beginners underbuild. Aim for 2 to 3 inches across the tank, sloped from about 1.5 to 2 inches at the front to 3 to 4 inches at the back. The slope gives carpeting plants enough to root into and adds visual depth. On inert substrate, push root tabs 1 to 2 inches deep and space them 4 to 6 inches apart in planted areas, then replace them every 4 to 6 weeks.
Sea Life Planet's setup guides cover this exact decision — aquasoil, potting soil in a dirted tank, or inert substrate — organized by tank size and system type, along with the tank-weight and substrate-volume numbers that are easy to get wrong before the tank arrives.
First-level category landing for freshwater fish: H1 and intro for freshwater care guides and tank setup.
Stage 2: Lighting, matched to the plants rather than the tank
Light is the throttle on the whole system. Below the level a species needs, plants cannot photosynthesize faster than they respire, and they melt. Above it, extra light does not buy proportionally more growth; it buys algae.
The honest measurement is photosynthetically active radiation at the substrate, not fixture wattage. A 30 W LED with good optics can outperform a 40 W fluorescent tube at plant level. That is why you choose the light after you choose plants: match the fixture to the most demanding species you intend to keep, and treat spectrum as secondary to intensity at the substrate.
Photoperiod is the variable you tune week to week. Start at six hours a day for the first month, then extend to seven or eight if algae stays away. Past nine hours, light stops helping plants and keeps helping algae. Put the fixture on a timer from day one so the schedule does not drift.
Whether you inject CO2 changes the whole plan. Ambient equilibrium gives roughly 0.5 mg/L of dissolved CO2, while demanding carpeting species such as Glossostigma elatinoides want 20 to 40 mg/L. A low-tech setup accepts that limit, keeps light modest, and leans on easy, slow-growing species. A high-tech setup adds pressurized CO2, raises light, and commits to regular dosing and trimming. Mixing the two — a high-PAR fixture with no CO2 — reliably produces an algae bloom within about four weeks. Decide the tier before you buy the light.
Stage 3: Filtration and flow, sized for plants and not just fish
In a planted tank, the plants are the primary filter. They take up ammonia and nitrate directly. The filter's job is circulation, gas exchange, and mechanical and biological media capacity, and it has to do that without blasting the aquascape apart.
Hang-on-back filters suit tanks up to about 55 gallons and provide useful surface agitation. Canister filters make more sense on larger tanks because they hold more media, run quieter, and allow adjustable flow, which matters if you plan to run an inline CO2 diffuser. Sponge filters are the right call for shrimp tanks and fry, where gentle flow and no intake slots matter more than media volume.
Aim the output so water circulates through the whole tank and returns along the substrate. Dead spots with no movement collect debris and become algae hotspots, while one hard jet against a carpet or a stem bundle will uproot it. Gentle, continuous flow is also how CO2 and liquid nutrients reach the leaves. A static corner is a nutrient-starved corner.
During maintenance, rinse filter media in water you removed from the tank, never under the tap. Chlorinated tap water kills the nitrifying bacteria you spent a month growing.
Stage 4: Cycling and water preparation
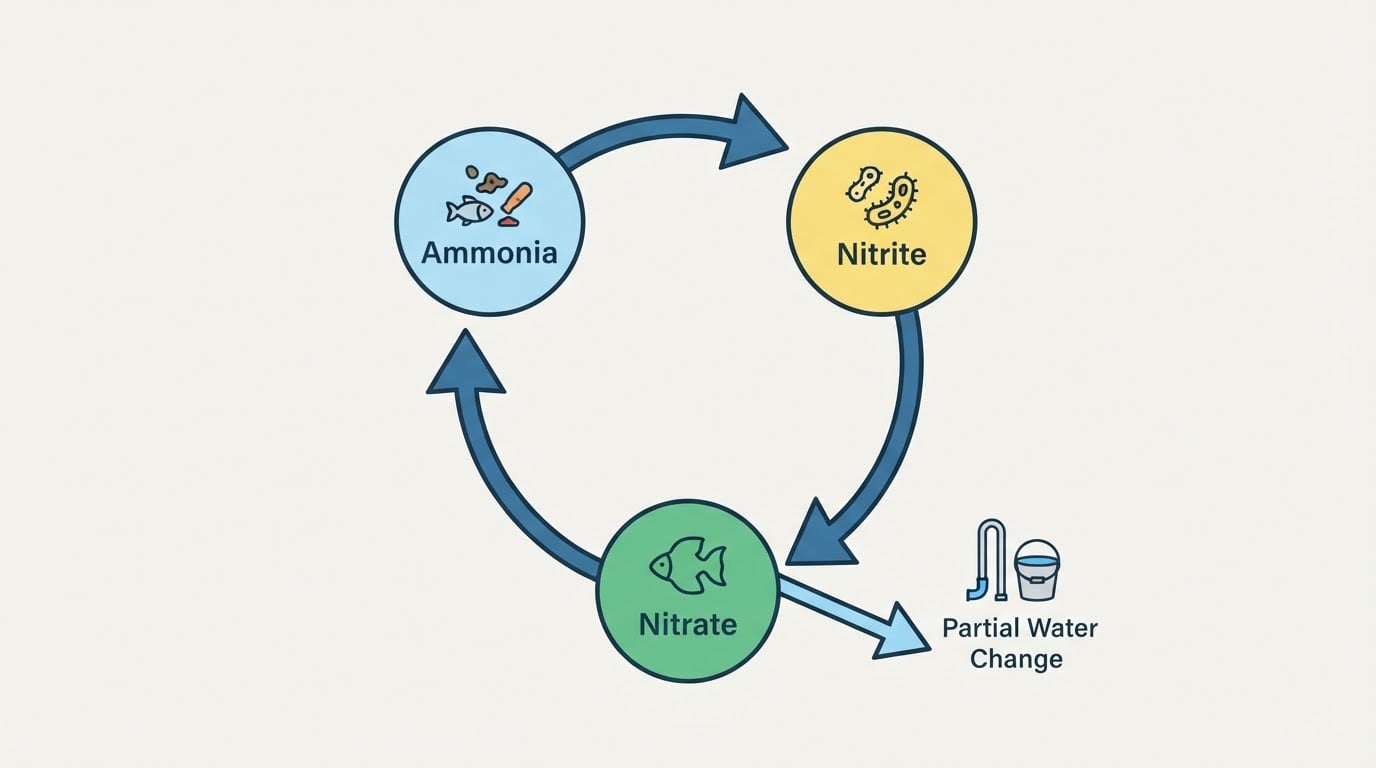
The nitrogen cycle runs in three steps: fish waste, uneaten food, and decaying plant matter produce ammonia, which is toxic; one group of bacteria converts it to nitrite, which is still toxic; another group converts nitrite to nitrate, which is far less harmful. In an unplanted tank, water changes remove the nitrate. In a planted tank, the plants consume it as fertilizer. The same process, explained for a general freshwater tank, is covered in this guide to the nitrogen cycle in aquariums.
Live plants also absorb ammonia directly, before bacteria process it. That is why planting on day one can shorten a cycle, and why heavily planted tanks often finish in one to two weeks while a bare tank takes longer. Treat the word cycled carefully, though: it is relative to the fish load. A tank that handles three small fish does not automatically handle twenty.
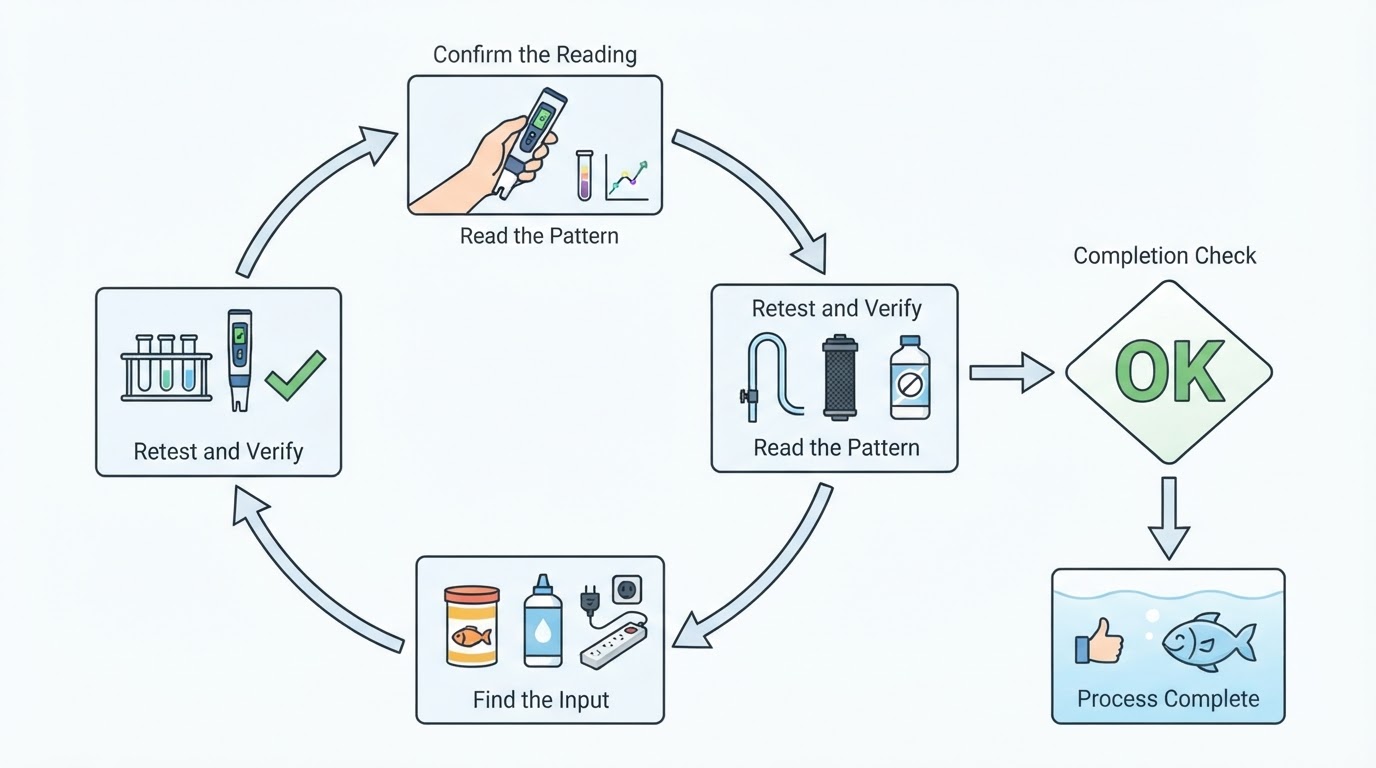
The fishless method is the one to use:
- Add an ammonia source — a pinch of fish food or a measured dose of liquid ammonia — and keep testing.
- Test ammonia, nitrite, and nitrate every few days with a liquid test kit.
- The cycle is complete when ammonia and nitrite both read zero and nitrate is present, confirmed across several consecutive tests.
- Do a partial water change before adding livestock to bring nitrate down to a sensible starting level.
Most planted tanks finish in two to six weeks, and a bottle of live nitrifying bacteria or used filter media from a healthy tank speeds that up. For a stronger guarantee before you stock, run a 24-hour ammonia-dosing challenge and verify that ammonia and nitrite still read zero the next day.
Add fish as a small first cohort — three to five hardy individuals — rather than the full stocking list, and test daily for the first two weeks after. If nitrate climbs past 40 ppm, do a water change. If the tank is still cycling and nitrate passes 30 ppm, a 25% change resets it.
First-month checkpoints
Use these four checkpoints so you always know whether the tank is on track.
When | What to do | What it means |
|---|---|---|
Week 1 | Six hours of light a day. Expect cloudy water with an active substrate. No fish. | Plants are settling and the cycle is starting. |
Week 2 | Test parameters every few days. Expect some leaf melt. | Ammonia and nitrite readings are the cycle working, not a crisis. |
Week 3 | Raise the photoperiod to seven hours. First 30% water change. | New growth should be visible on fast-growing species. |
Week 4 | If ammonia and nitrite read zero, add the first few fish gradually. Start weekly water changes. | The tank can now process a small bioload. |
The setup is finished when the substrate holds plants without them floating, the light runs on a timer at a stable photoperiod, water circulates through every corner, and ammonia and nitrite read zero across consecutive tests with nitrate present. Maintenance from that point is simple: change 25 to 30% of the water weekly, dose fertilizer after the change, and rinse filter media monthly in tank water.
Equipment selection: criteria you can apply
Start with tank size, because volume sets the cost of every mistake. Short, wide tanks light evenly and are easier to aquascape than tall, narrow ones. A 20-gallon long is the common beginner recommendation, and roughly 5 to 15 gallons is the most forgiving range. Below about 4 gallons, small errors move water chemistry faster, so nano tanks demand more discipline, not less.
Next, pick the plant tier. Undemanding species such as Anubias, Java fern, and mosses grow well in low-tech conditions. Carpeting plants and most colorful stem plants want more light, consistent nutrients, and usually CO2. Match the light to the top of that list, not the average.
Budget bands help you choose without overbuilding:
- A basic 10-gallon low-tech setup runs about $100 to $200 for the tank, light, filter, substrate, and plants.
- A 20-gallon setup with better equipment runs about $200 to $400.
- A CO2 system adds roughly $150 to $300, plus refills.
- Plants cost about $3 to $15 each, and a 20-gallon tank needs 8 to 15 of them for a proper planting.
Three items are worth buying before the first fish: a heater set to 76 to 78°F for tropical species, a liquid test kit for ammonia, nitrite, and nitrate, and an outlet timer for the light. If you use inert substrate, add a root-tab supply; if you use aquasoil, plan liquid fertilizer for the water column once plants are growing.
Then apply one rule for the first month: change one variable at a time. If you raise the light, start CO2, and switch fertilizer on the same day, you will not know which change caused the algae.
Beginner questions that decide how the tank turns out
Can I plant before the tank is cycled?
Yes, and it usually helps. Planting on day one lets roots establish while the cycle runs, and the plants consume ammonia before it becomes a problem. Plant densely rather than sparsely, because open space is where algae starts.
Is cloudy water a problem?
With an active aquasoil, expect the water to cloud for a day or two after flooding and then clear. That is normal. Persistent green water is a different problem, usually too much light with too few plants.
How do I know the tank is cycled?
Ammonia and nitrite at or near zero, nitrate present, confirmed on several consecutive tests. The 24-hour ammonia challenge is the stronger check before you buy livestock.
Do I need CO2?
No. A low-tech planted aquarium with easy plants, modest light, and weekly water changes is a complete setup. CO2 is what unlocks fast, dense growth in demanding species, so decide which tank you are building before you buy the light.
How many plants should I start with?
Plant densely from day one — roughly 8 to 15 plants in a 20-gallon tank, weighted toward fast-growing species while the tank settles. Empty substrate is an algae nursery.
Which mistakes actually cause failures?
Too much light without enough CO2. Too few plants. Skipping the cycle and adding fish immediately. Over-cleaning the filter until the bacteria are gone. Burying the rhizome of Anubias or Java fern instead of attaching it to hardscape. Starting with difficult species. Changing several variables at once so you cannot tell which one worked.
Do the stages in this order and a planted aquarium stops fighting you: the substrate feeds the roots, the light feeds the growth, the filter and flow carry what the plants need, and the cycle carries the fish. Most problems beginners blame on bad luck are stages done out of order.