Decide the format first, then the volume
Most marine tanks sold today fall into four formats: an all-in-one (AIO) with rear filtration chambers, a rimless or braced display paired with a sump and an overflow, a standard tank run on a hang-on-back (HOB) filter or canister, and a nano or pico tank. Format decides where water drains, where equipment lives, how much water the system really holds, and what you can stock. Volume comes second, because a 40-gallon AIO and a 40-gallon sump system hold different amounts of water, hide equipment differently, and fail differently.
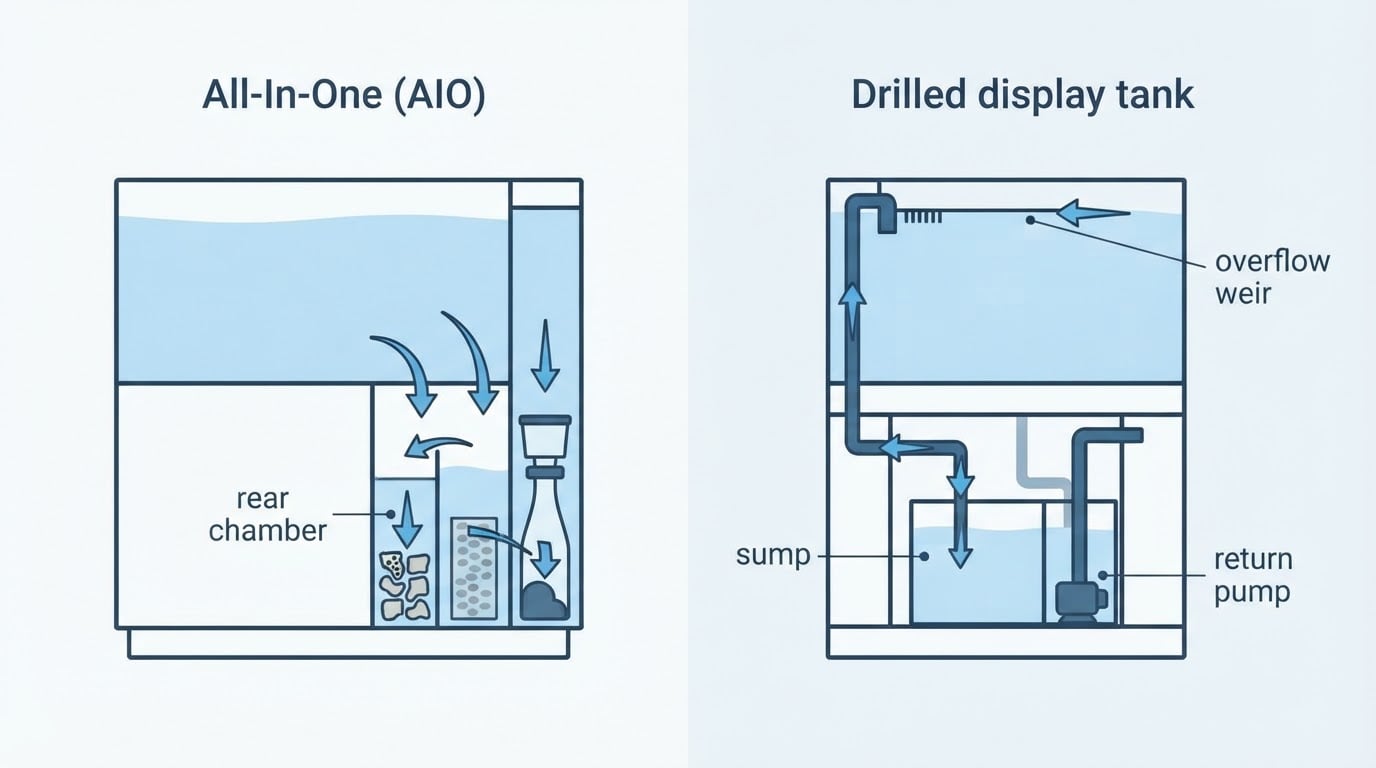
If you are buying a kit to start this season, an AIO or a standard tank with a HOB filter is the shortest path to a running system. If you expect stony corals, a heavy fish load, or equipment upgrades in the next two years, plan the sump and overflow now. Retrofitting one usually means draining the tank or buying a second one.
The four formats at a glance
Format | How filtration works | Works best when | Trade-off to accept |
|---|---|---|---|
All-in-one | Rear chambers hold filter media, a drop-in skimmer, and the return pump | You want a closed lid, one purchase, and no plumbing decisions | Chamber space caps skimmer and refugium size, and upgrades must fit the chambers |
Display with sump | An overflow weir or box drains to a sump below; a return pump pushes water back up | You want the most water volume, a large skimmer, and equipment hidden from view | More plumbing and noise points, plus a power-off drain-down you have to plan for |
Standard with HOB or canister | Water leaves through a siphon or intake, passes the filter, and returns | Budget is the binding constraint, or the tank has no overflow and cannot be drilled | Heaters, skimmers, and pumps stay visible, and canister media needs scheduled cleaning |
Nano or pico | Usually rear chambers or a small HOB filter | Space or running cost is the limit, or you want an invertebrate-focused display | Small volume moves faster in salinity, temperature, and nutrients, so the fish list stays short |
Rimless versus rimmed, and glass versus acrylic, are finish and structure decisions that sit underneath this table. The format row is the one that determines what you can add later.
Volume and footprint classes
Pico and nano systems are commonly grouped under about 20 gallons, small tanks run from roughly 20 to 40 gallons, mid-size from 40 to 75, large from 75 to 125, and extra-large above that. Those bands are conventions, not standards. More useful than the gallon figure is the footprint plus the open swimming length across the front glass.
A long, shallow tank gives more usable swimming room and easier reach to the bottom than a tall tank of the same volume. Tall tanks look dramatic but need longer tools and more light penetration, and rockwork becomes harder to place. Decide which fish you want at adult size, then check whether the footprint gives them a straight run, not just the recommended gallon number.
Weight belongs in the same decision. A filled tank carries water, rock, sand, and the stand, so the floor load is much higher than the water volume alone suggests. On an upper floor, in an older building, or across joists, have the floor assessed before the tank is delivered. Measure the doorway, stair turn, and elevator too, since a large tank that cannot reach the room is a return shipment.
Glass or acrylic
Glass resists scratching better and holds clarity for years, especially low-iron front panels. It is heavy, and large glass tanks usually need thicker walls, bracing, or a rim. Acrylic is lighter and can be polished if it scratches, but it scratches more easily, and very large panels need enough thickness to resist bowing. Acrylic also insulates slightly better and is easier to drill for an overflow.
For a rimless tank, the glass edges and the stand's flatness matter more than the brand of silicone. A rimless tank sitting on a stand that is not flat puts stress on the seams. A foam mat or a purpose-made pad distributes that load. If you plan to drill, confirm the panel is tempered or not before anyone touches a hole saw.
Overflow and plumbing decide your future
An overflow is either internal, with a weir inside the tank, or external, with a box on the back or side. Internal overflows take up tank space but keep the plumbing hidden. External boxes keep the display clear but add depth behind the tank. A siphon-style HOB overflow works without drilling, but it depends on keeping the siphon, so it is the option to avoid on a tank you plan to leave unattended.
The figure that matters most is drain-down volume: how much water leaves the display and lands in the sump when the return pump stops. Water keeps draining until the return nozzle breaks siphon or the sump level drops below the drain intake. Size the sump to hold its normal operating level, the drain-down volume, and the equipment sections together, then test it by switching the return pump off on purpose. The old percentage rule of thumb is a sanity check, not a calculation.
Match the return pump to the drain capacity rather than to the display volume alone. A return that outruns the drain raises the display level; one that is too weak leaves the overflow noisy and the sump short of flow. Add a siphon break or a check valve, and test both during the first week rather than during the first power cut.
Stand, level, and access
Level the stand front-to-back and side-to-side, and shim under the stand, never directly under the tank. The stand must support the full footprint, including the corners, and stay rigid when someone leans on it. Moisture-resistant material or a sealed finish matters because salt creep and spills find every joint.
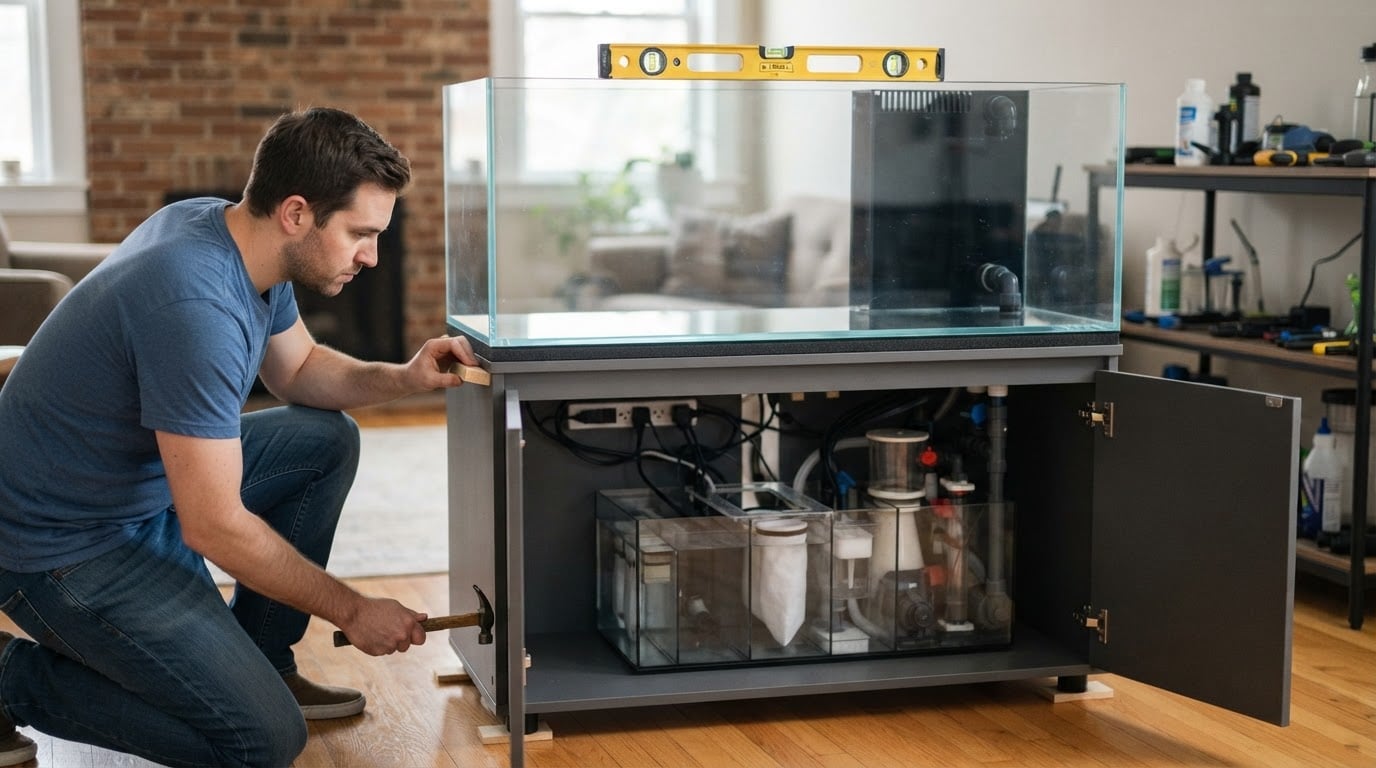
Plan access before you fill. Leave room to lift the skimmer cup, change filter socks, and reach the return pump without dismantling plumbing. Route cords with drip loops below the outlets, and keep power strips off the floor of the stand where a spill or a leak will find them. A stand with a removable side panel or a wide front opening saves hours over the life of the tank.
How the format changes stocking and maintenance
A sump adds water volume, hides equipment, and makes room for a larger skimmer, a refugium, or a reactor. It also adds failure points: an overflow that can clog, a return pump that can stop, and a drain that can gurgle. An AIO removes most of those failure points and gives you a single footprint to plan around, at the cost of chamber space and equipment choice.
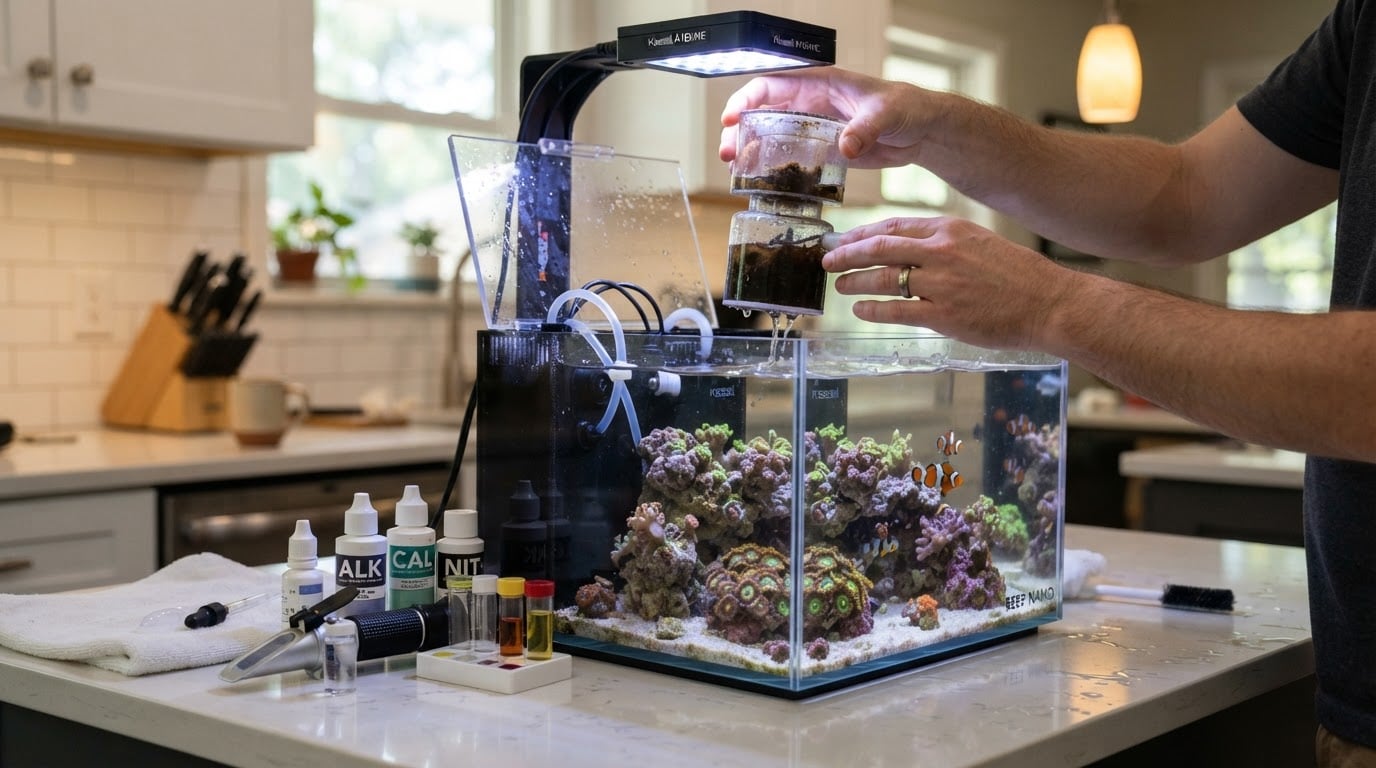
Nano tanks are usually easier to place and cheaper to run, but the small volume means salinity, temperature, and nutrients move faster. That pushes maintenance toward smaller, more frequent water changes and closer testing rather than toward fewer chores. Stocking is limited by adult fish size and swimming space, so choose small species that suit the footprint and leave room to grow.
Whichever format you pick, stock slowly. Add hardy fish first, one or a small group at a time, with a quarantine period before anything enters the display. Add corals after parameters have been stable for a while, and match each coral to the light and flow your system actually produces rather than to the light and flow you intend to upgrade to.
Selection checklist
- Measure the exact footprint, then measure the route to the room, the doorway, and the stair turn.
- Decide sump, AIO, or HOB before ordering, and confirm the stand accommodates your choice.
- Check that the skimmer, heater, and return pump fit the chamber or sump you selected.
- Confirm the floor can carry the filled weight at that footprint.
- Choose glass or acrylic knowing how each handles scratching, weight, and drilling.
- Plan drain-down volume, then test a simulated power cut before livestock arrives.
- Match the fish list to adult size and open swimming length, not juvenile size.
- Budget for test kits, a refractometer, and a quarantine or hospital setup.
- Decide your water source, either a reverse-osmosis unit with salt mix or premixed saltwater, before the first fill.
Startup sequence from placement to cycling
- Place and level the empty stand, then set the tank and confirm every corner sits flat.
- Fill with tap water and run the system for a day to check seams, bulkheads, and the drain for leaks.
- Drain the tap water, place rock directly on the bottom, and add sand or gravel around it so burrowers cannot topple the structure.
- Mix saltwater to the target salinity, fill the system, and bring it to temperature.
- Start circulation, the skimmer, and the return pump, then confirm the overflow restarts quietly after a power cut.
- Add a bacterial starter and an ammonia source, then test ammonia and nitrite until the filter converts ammonia to nitrate.
- Complete a partial water change, confirm salinity and temperature hold steady, and check alkalinity.
- Add the first quarantined fish, then wait before the next addition so the bacteria can catch up.
- Set the maintenance baseline: how often you test, how much water you change, and how you clean the return pump and skimmer.
The cycle finishes when the tests show it, not when the calendar says it does. Rushing this step costs more time than waiting, because a fish added to an unfinished cycle starts the whole process over with a sick animal in the tank.
Common mistakes that force an upgrade
- Buying on price, then discovering the skimmer will not fit the chamber or the stand.
- Setting a rimless tank on a stand that is not flat or not level.
- Sizing the sump without the drain-down volume, then mopping the floor after the first outage.
- Choosing a tall tank without checking that you can reach the bottom with tools and a magnetic scraper.
- Stocking by gallon number while ignoring swimming space and adult size.
- Adding livestock before the cycle is finished because the water looks clear.
If two formats both fit your space and budget, choose the one whose weakest point you can live with for years: chamber space, plumbing work, visible equipment, or a small water volume. That single trade-off is what you will notice every week, long after the purchase price is forgotten.