What a saltwater aquarium kit actually includes
A kit bundles a tank with the hardware that keeps water moving, filtered, lit and warm. The package usually covers five jobs, and the headroom inside each one varies more than the box suggests.
Component | What it does | What to check on the box |
|---|---|---|
Tank and lid | Holds water and limits evaporation | Glass thickness, edge finish, lid material, spare parts |
Filtration | Traps particles and hosts nitrifying bacteria | Chamber volume, media type, whether media is proprietary |
Lighting | Supports coral photosynthesis and lights the viewing area | Spectrum and intensity, dimming, timer, mounting height |
Return pump or wavemaker | Moves water through filtration and creates flow | Adjustable output, noise level, impeller availability |
Heater | Holds a steady temperature | Wattage against volume, thermostat, replacement size |
Plumbing and overflow | Routes water between tank and filtration | Bulkhead sizing, surface skimming, hose quality |
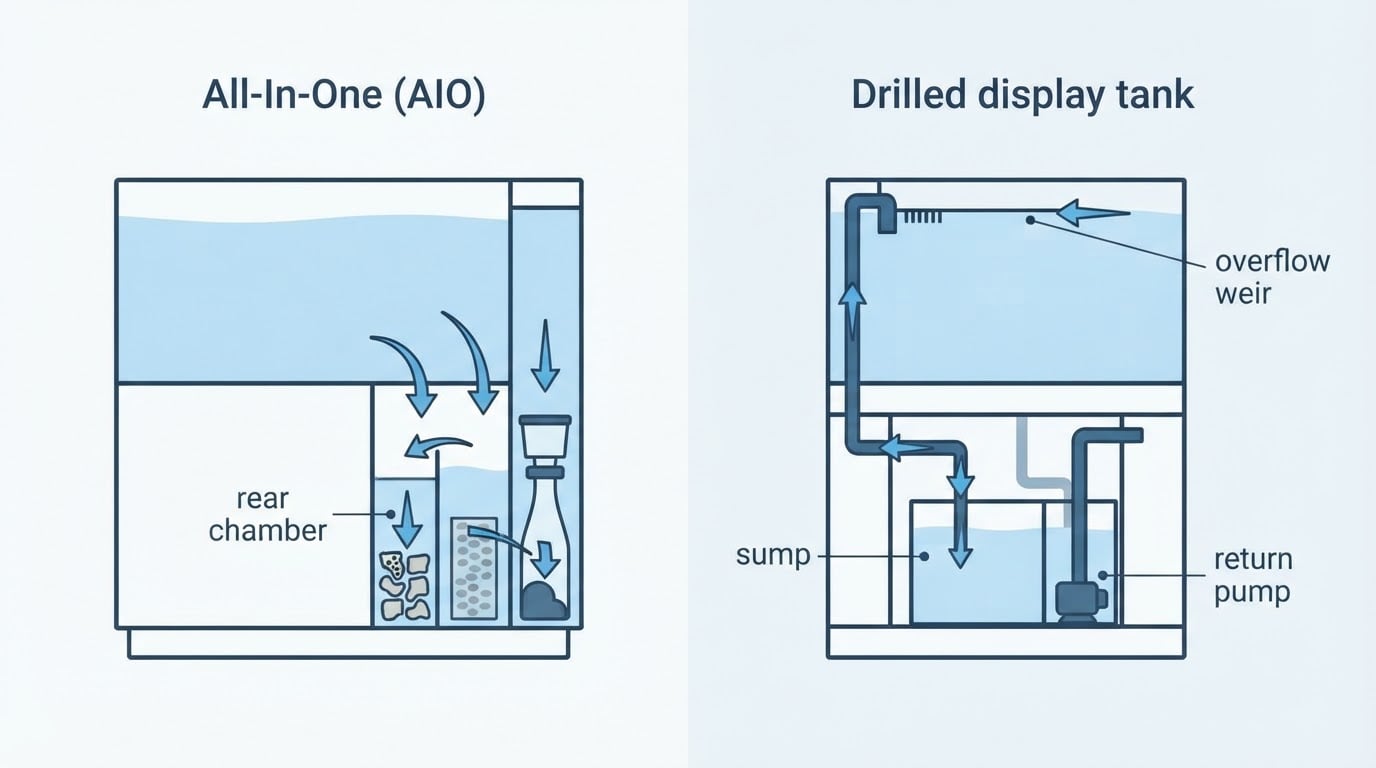
All-in-one kits hide filtration in a rear chamber. Reef-ready kits ship with a drilled overflow and expect a sump, which is often a separate purchase that the product name does not mention. Read the contents list line by line and mark which of the six jobs above are actually covered.
The word complete describes the hardware in the box, not a running aquarium. That distinction matters because the missing half of the system is biological and chemical, and it carries most of the remaining cost.
What the box almost never includes
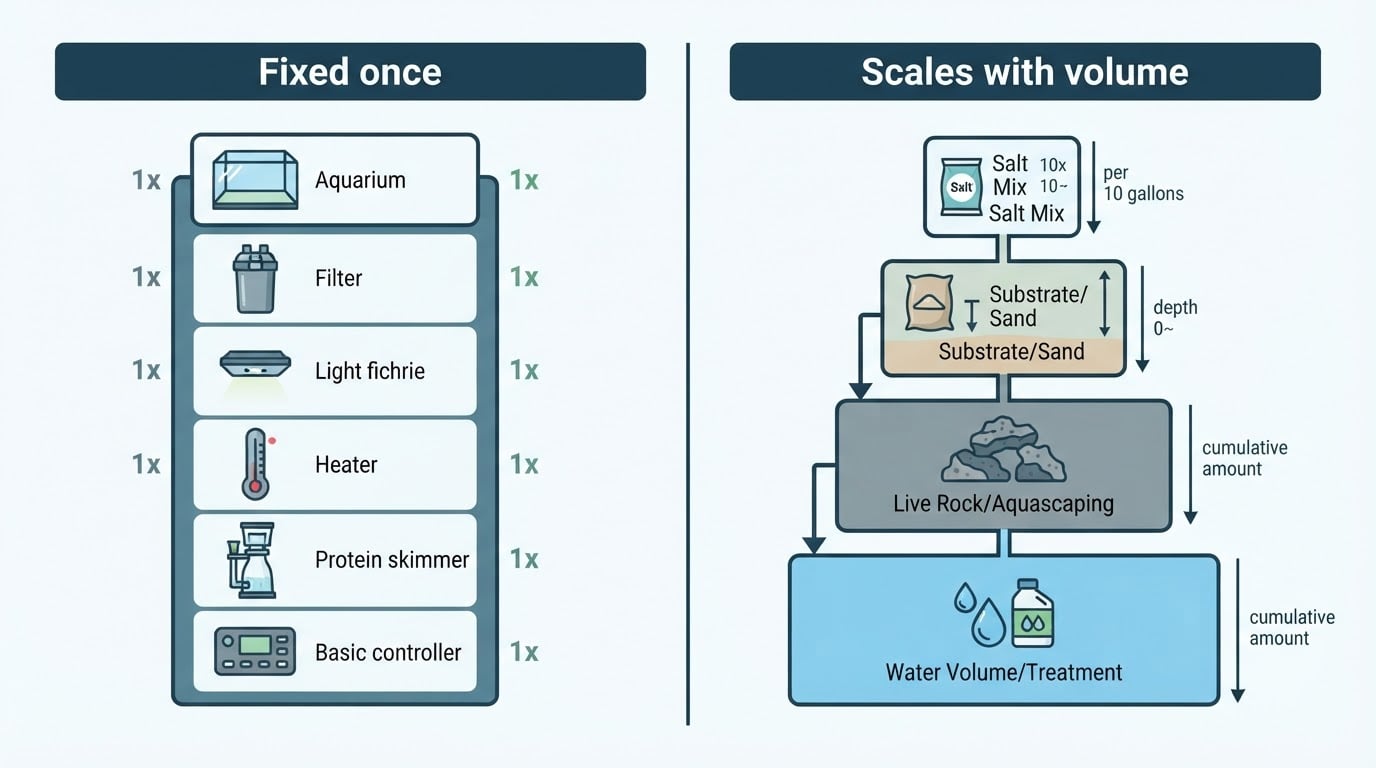
The gap between a kit and a working aquarium is where the rest of the budget goes. These items are routinely sold separately, even in packages labeled as ready to start.
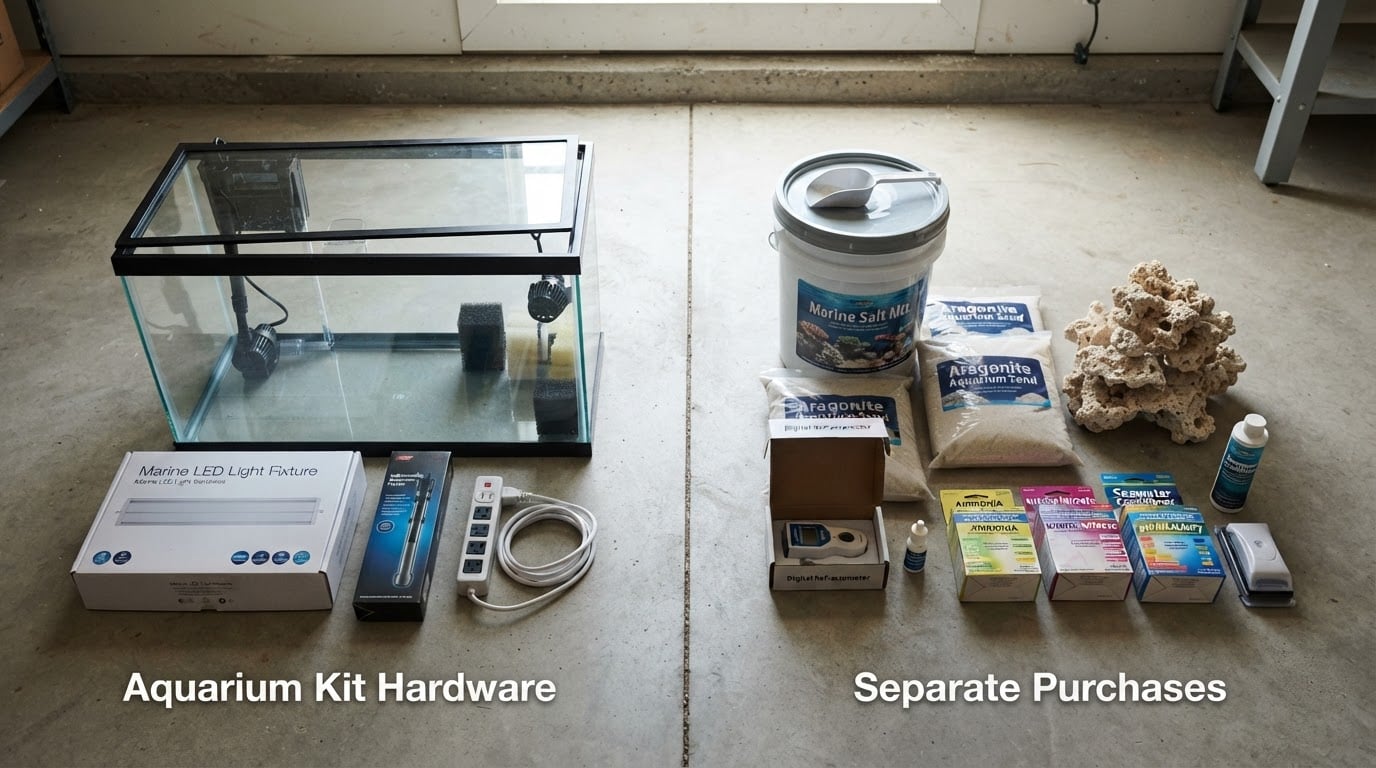
- Rock, live or dry. Rock provides most of the surface area for nitrifying bacteria and the structure you aquascape around.
- Substrate. Sand or crushed coral for most setups, or a bare bottom if you plan to siphon regularly.
- Salt mix and purified water. A reverse-osmosis unit or a dependable source of RO/DI water solves both mixing and top-off.
- A refractometer and calibration fluid. Swing-arm hydrometers drift and make salinity decisions unreliable.
- Test kits. Ammonia, nitrite and nitrate for the cycle, then alkalinity and pH. Reef tanks add phosphate, calcium and magnesium.
- A stand rated for the filled weight. Water is heavy, and a tank on ordinary furniture is a structural question, not a style choice.
- Auto top-off, or at minimum a plan for daily evaporation replacement.
- Consumables and tools. Food, filter media, algae scraper, siphon, buckets, thermometer and acclimation supplies.
- Quarantine capacity. A small separate tank is the least expensive disease protection available to a hobbyist.
Add those lines to the purchase price before comparing two kits. Systems that look equivalent on the shelf separate sharply once rock, lighting headroom and test equipment are included, so compare the total rather than the sticker.
Matching the kit to your experience and your livestock plans
If this is your first marine tank, choose a system that hides its plumbing and uses standard parts. A rear-chamber all-in-one with a lid, a replaceable heater and a media rack you can restock with generic filter media keeps the first year focused on water quality instead of equipment repair.
If you have already run a marine or heavily stocked freshwater tank, a drilled tank with a sump gives you room for a skimmer, a refugium and a place to hide equipment. That flexibility costs more upfront and adds plumbing you need to understand before you fill it.
Your livestock plan drives lighting and flow more than the tank itself. A fish-only system tolerates basic LEDs. Soft corals and many LPS corals need mid-range lighting plus stable parameters. Stony corals and clams need stronger, controllable light, higher flow, and a top-off and dosing routine that a starter kit rarely supports.
Treat the kit as the ceiling of the system. When the light cannot be upgraded, the chamber cannot fit a skimmer, or the lid traps heat, the practical answer is to replace the whole setup rather than improve it.
Size classes and honest stocking limits
Volume drives stability more than any single piece of equipment. A larger body of water dilutes waste and slows the change when something goes wrong, which is why a beginner tank is usually easier at thirty gallons than at eight.
- Under 20 gallons. Salinity and temperature swing quickly, evaporation is large relative to the volume, and there is room for a few small fish at most. Workable for a nano setup built around small gobies, a pistol shrimp pair or a single species. Not workable for tangs, large wrasses or anything that reaches more than a few inches.
- 20 to 40 gallons. The practical beginner range. Stable enough for a pair of small fish, a cleanup crew and soft corals, with water changes you can carry in one bucket.
- 40 to 75 gallons. Room for separate territories and a small community. Equipment cost and water-change volume climb with the tank.
- Above 75 gallons. Reef-ready systems with a sump make sense at this size. Plan for floor support, more rock, and a longer cycle because of the water volume involved.
Stocking is a function of bioload and territory rather than inches of fish per gallon. Ask three questions about every fish before buying: how large does it reach as an adult, how much open water does it patrol, and what does it eat. Add one fish at a time, let the bacteria adjust, and keep a quarantine tank between purchases.
Two small fish that occupy different zones of the tank stress each other less than one fish that will outgrow the glass.
Questions to ask before you pay
This checklist catches the mismatches that a product photo hides. Write the answers down, because the awkward ones are the ones that decide whether the system is still working for you in two years.
- Is the included lighting adequate for the corals I want next year, not only the fish I want next month?
- Can I replace the filter media with generic products, or does the kit require a proprietary cartridge?
- Does the filtration chamber fit a protein skimmer, or is there space behind the tank for one?
- Is the heater included, and is it a standard size I can swap without modifying the tank?
- Are the impeller, return nozzle and bulkheads standard parts with spares available?
- What is the water volume once rock and sand displace it, rather than the advertised capacity?
- Does the lid hold heat, and can I keep the temperature steady in a warm room?
- Can I add an auto top-off, and where do the sensor and reservoir go?
- Is the included stand rated for the filled weight, and is the floor level where it will sit?
- Does the overflow skim the surface, where proteins collect?
- What does the setup cost once rock, sand, salt, test kits and a stand are added?
- What is the return policy on glass and electronics, and which parts does the warranty cover?
If a seller cannot answer questions 2, 3 and 5, expect parts availability to be the recurring problem. Those three determine whether the kit stays serviceable.
From unboxing to first fish: a startup sequence
Set aside a few weeks. The hardware takes an afternoon, while the bacteria take considerably longer than the box implies.
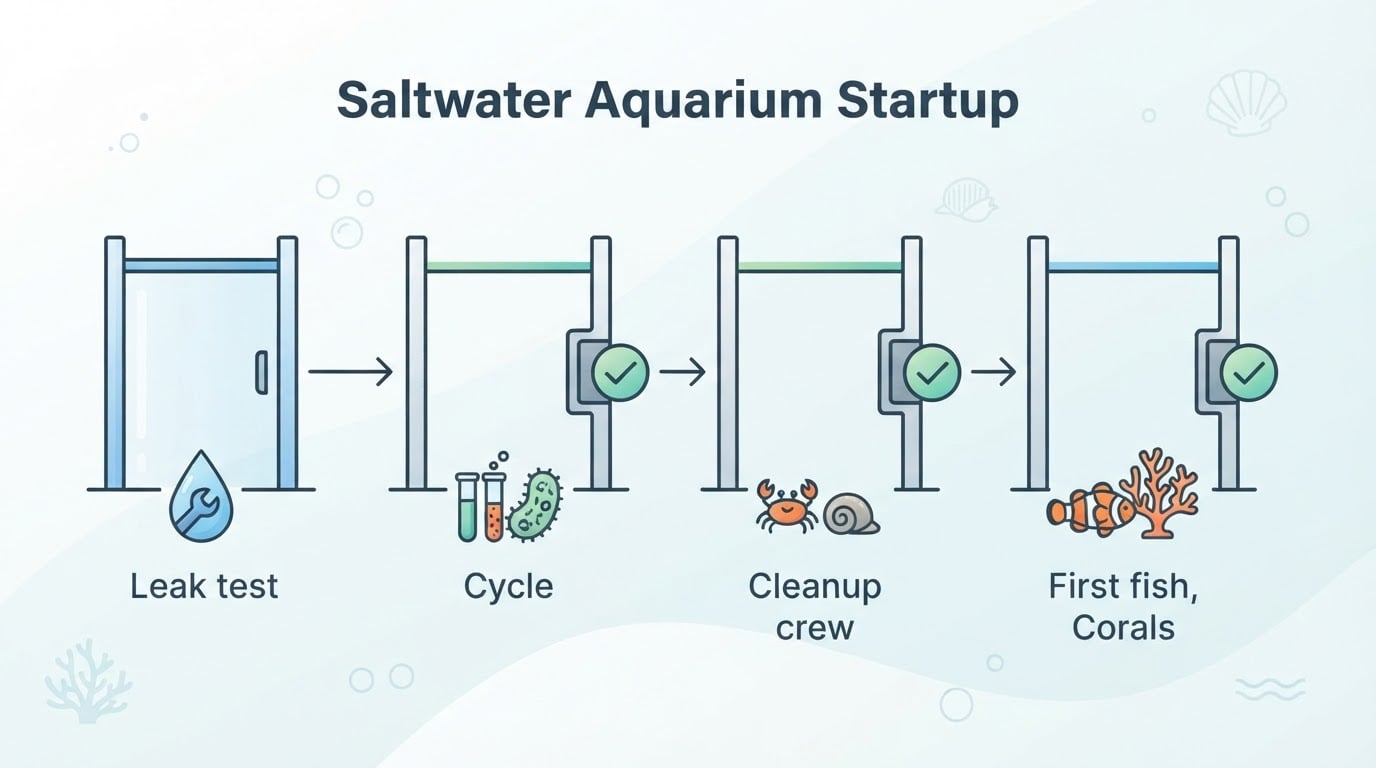
- Leak test before anything else. Fill with tap water outdoors or in a utility room, run the pump, and watch seams, bulkheads and hose connections for 24 hours.
- Place and level the stand. Confirm the floor supports the filled weight and that the tank sits level before water goes in.
- Rinse the substrate and set the rock. Put rock on the bottom or on a base layer so burrowing fish cannot topple the structure later.
- Mix saltwater with purified water. A specific gravity near 1.025 is a common reef target; confirm it with a calibrated refractometer rather than a swing arm.
- Bring the system to temperature and run it dry of livestock. Check that flow reaches the far corners and that no pump or overflow is noisy.
- Start the cycle with a fishless ammonia source or a labeled bacterial starter, then test ammonia, nitrite and nitrate on a fixed schedule and record every reading.
- Wait for the completion checkpoint. Ammonia and nitrite read zero after an ammonia dose, and nitrate is rising. Expect weeks rather than days, and expect the timeline to vary with temperature and surface area.
- Change water to lower nitrate, then add a small cleanup crew. Active snails and hermits plus a light algae film on the glass are decent evidence that the system is processing waste.
- Add the first fish after quarantine. Feed lightly, test daily for the first week, and hold the second fish for a few weeks so bacteria can catch up.
- Add corals only after parameters hold steady for weeks. Start with soft corals, then move to stony corals once alkalinity and salinity stay stable between tests.
- Set a maintenance rhythm. Replace evaporated water daily, change a portion of the water weekly, rinse mechanical media, and test on a schedule you actually keep.
The trade-offs that decide whether the kit was worth it
A kit is cheaper to start and harder to upgrade. That single trade-off is the thing to judge before paying, because every other complaint follows from it.
Lighting is the most common regret. A fixture that grows soft corals may not carry the stony corals you want in a year, and a replacement light frequently costs more than the original kit did. Proprietary consumables are the second issue: cartridge filters, custom media and non-standard heaters lock you into one supplier at one price.
Open-top rimless tanks look clean and evaporate quickly. Without daily top-off, salinity climbs between water changes and the livestock pays for it. Small nano systems carry the opposite trap: inexpensive to buy, demanding to keep, because the same mistake that causes a small shift in a large tank can crash ten gallons overnight.
The reverse case is worth stating too. If you want a fish-only tank with two small fish and no coral plans, a sealed all-in-one kit with basic lighting is genuinely sufficient. Upgrading it would be wasted money, and the checklist above will confirm that quickly.
A decision rule you can apply today
Name the livestock you want in two years, then test the kit against four things: lighting intensity and spectrum for those animals, filtration volume for a skimmer, flow at the far end of the tank, and parts availability for the pump and heater. A kit that passes all four is a sound purchase.
If it fails on lighting or skimmer space, buy the tank and hardware separately. Those two determine what the system can hold, and no later accessory fixes them cheaply. The check takes ten minutes and usually prevents the second purchase that makes a cheap kit expensive.