The Short Answer: Sequence Matters More Than Gear
Marine tanks fail on timing far more often than on equipment. The order that works is: choose the system type, size the tank by trade-off, buy and leak-test the hardware, mix water to the right salinity, cycle until the tests say the tank is done, add a small cleanup crew, add one hardy fish after quarantine, and only consider corals after the tank has been stable for several months.
Every step in that list is a checkpoint, not an appointment. You move forward when the water tests and the tank's behavior say so, not because a calendar says week four.
Pick the System Type Before the Tank
Three layouts cover almost every beginner build.
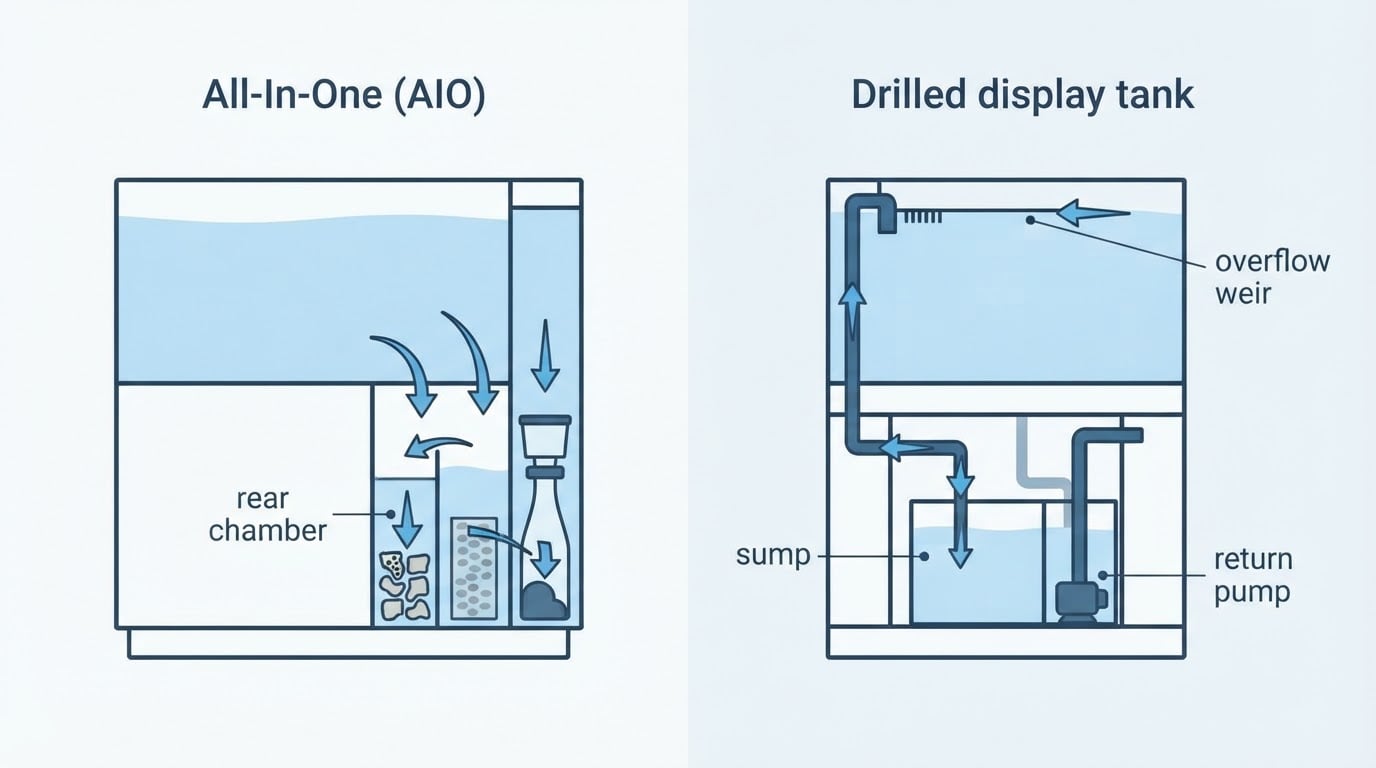
All-in-one (AIO). The tank has rear chambers that hide the heater, return pump, filtration media, and often a small skimmer. Fewer plumbing decisions, fewer leak points, faster to start. The cost is chamber space and less room to upgrade; a compact skimmer in a rear chamber is not the same as a full-size one.
Sump-based. A separate container below the tank holds filtration, skimmer, heater, and return pump. It adds water volume, keeps equipment out of sight, and makes maintenance easier. It also adds plumbing that must be assembled and tested, plus a drain-down volume you have to account for so a power outage does not put water on the floor.
Tank with hang-on or canister filtration. The cheapest entry point. It works for a simple fish-only setup, but equipment sits in view, surface skimming is weaker, and evaporation handling is manual.
Pick the system you will actually maintain. A sump you never clean is worse than an AIO you keep up with.
Choose Tank Size by Trade-Off, Not by Preference
Water volume is stability. The same uneaten food or dead snail moves the chemistry much less in 60 gallons than in 10. Small tanks are also harder on temperature and salinity, because a cup of evaporation changes a small body of water faster.
The trade-off looks like this:
Decision factor | Under 20 gallons | 30 to 75 gallons | Over 90 gallons |
|---|---|---|---|
Parameter stability | Least forgiving | Comfortable for a beginner | Very stable |
Space and floor loading | Easy to place | Fits a standard stand | Needs real floor planning and a level surface |
Equipment choice | Limited, compact models | Widest selection | Larger, costlier models |
Water change volume | Quick | Moderate | Heavy, and you need a plan for the waste water |
Weekly time | Lower per change, more frequent correction | Predictable | Highest per change |
Cost of a first mistake | A single error can crash the tank | Mistakes are diluted | Slow to show and slow to fix |
For a first tank, the 30-to-75-gallon band is the usual sweet spot: enough water to buffer beginner mistakes, still manageable with buckets or a small mixing station. A nano tank can work, but treat it as an advanced choice that happens to be small.
Check the floor and the stand before you buy. A filled tank is heavy, and it needs to be level in both directions so the glass is not carrying uneven stress.
Buy the Essential Equipment, Tier by Tier
Buy in tiers so you are not paying for reef hardware before you have a cycled tank.
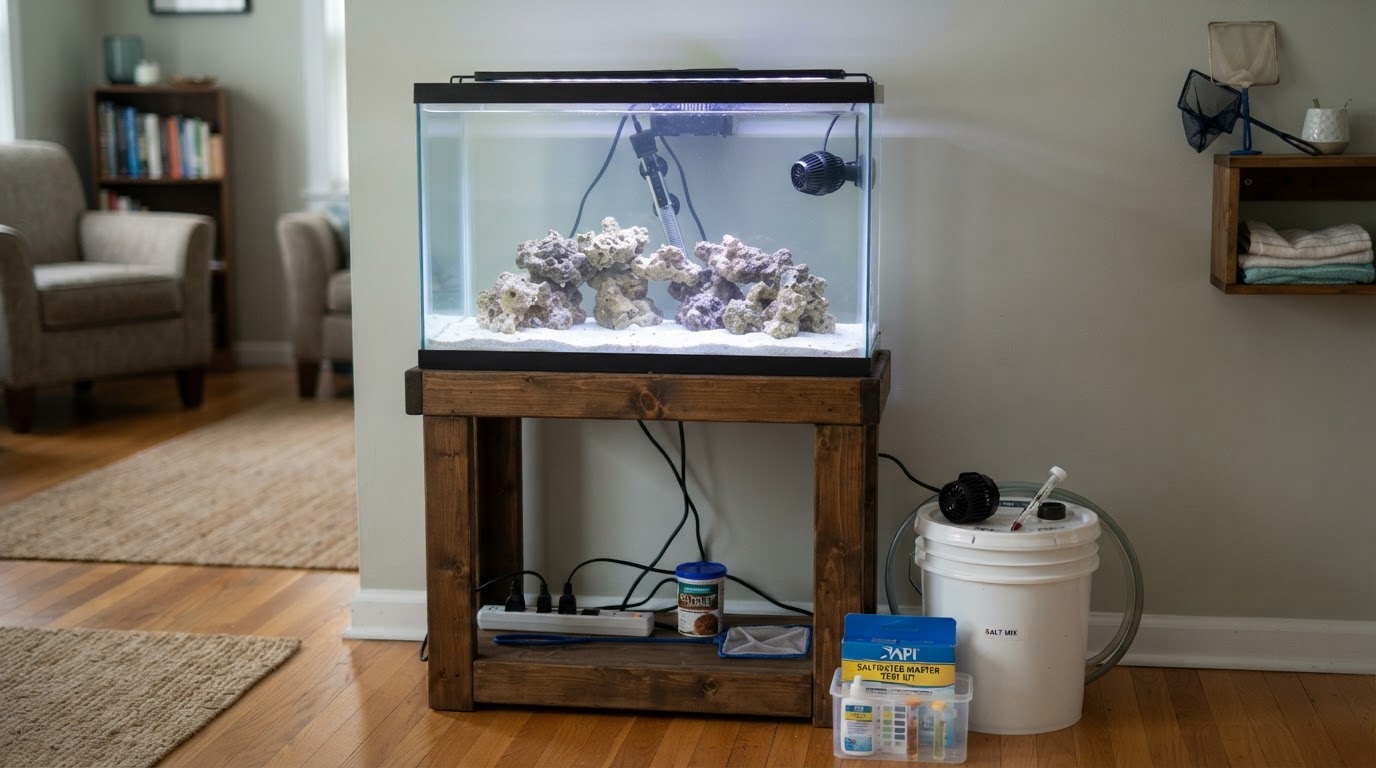
Must have for any saltwater tank:
- A heater plus a separate thermometer or controller. Two readings beat one, and a stuck heater is a livestock emergency.
- A return pump or filter. This is water movement through filtration. In an AIO or sump build, it is the return pump.
- A wavemaker or powerhead. Flow keeps debris suspended so filtration can remove it, and keeps the water surface moving.
- Test kits for ammonia, nitrite, nitrate, pH, and alkalinity. You cannot cycle a tank you are not measuring.
- A refractometer and calibration fluid. Salinity is your most important number, and a swing-arm hydrometer is not accurate enough to trust.
- An RO/DI water source. Starting from purified water removes the variability of tap water.
- Salt mix, a mixing container, a siphon, and dedicated buckets. Never share buckets with household cleaning.
- A quarantine tank. A small bare tank with a filter, heater, and hiding place. This is the cheapest insurance in the hobby.
- An algae magnet or scraper. Glass you can see through is part of the hobby.
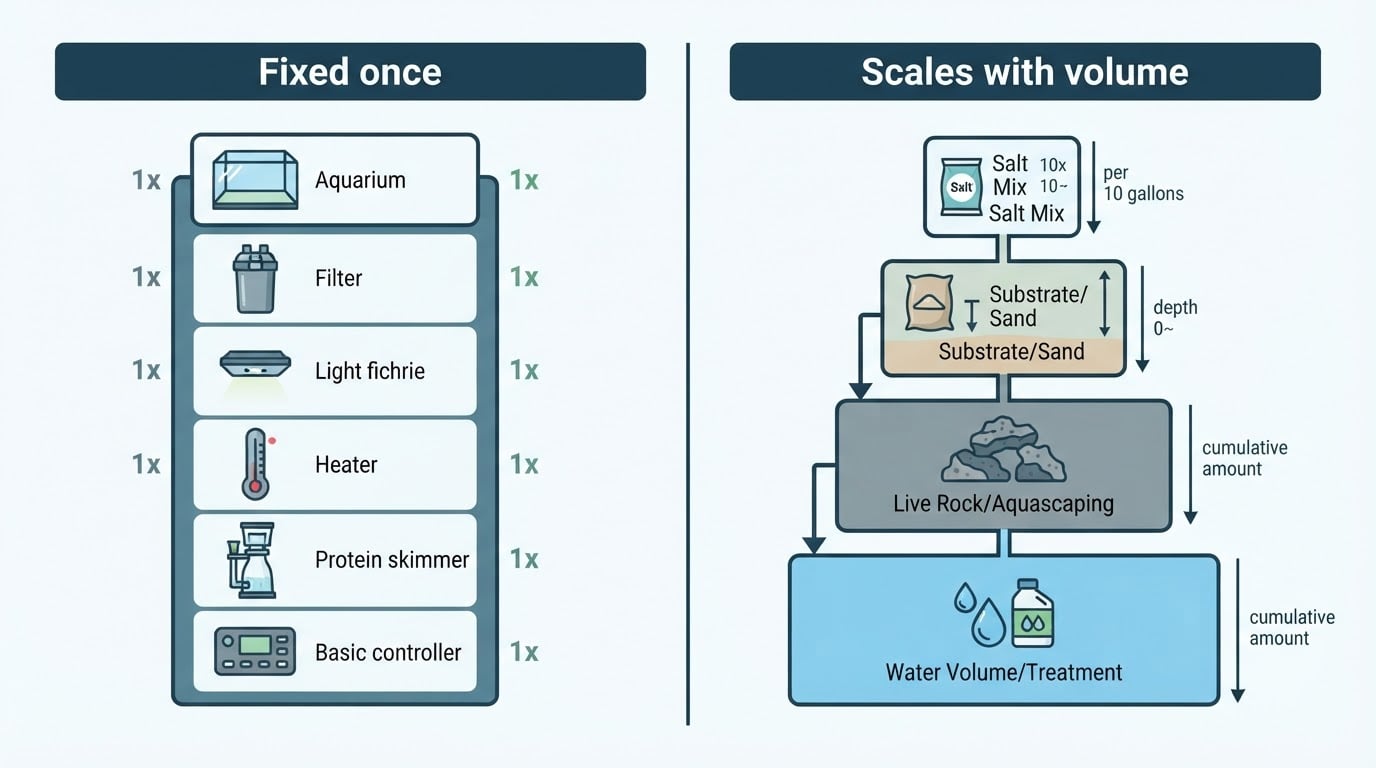
Strongly recommended: a protein skimmer, which removes dissolved organic material before it breaks down; an auto top-off, which replaces evaporation continuously and keeps salinity steady; and a battery-backed air pump or backup circulation for outages.
Reef only: reef-rated lighting, dosing for alkalinity, calcium, and magnesium, and phosphate control. Fish-only tanks do not need any of it.
Skip the temptation to buy livestock on the same trip as equipment. Get the tank running and tested first.
Mix Water and Lock In Salinity
Fill the tank with RO/DI water, bring it to temperature, then mix salt to a specific gravity of about 1.025, which is roughly 35 parts per thousand and close to natural seawater. Mix and aerate for a few hours before you trust the reading, and measure at the tank's temperature with a calibrated refractometer.
Keep two targets visible from the start: 76 to 78°F (24 to 26°C) and stable salinity. Stability matters as much as the exact number, so avoid chasing someone else's preferred value every week.
Here is the mistake that catches more beginners than any other. Evaporation must be replaced with fresh RO/DI water, not saltwater. Salt does not evaporate. If you top off with salt mix, salinity climbs a little every day, and the tank drifts out of range even though nothing else changed.
Mixing your own water trades an upfront RO/DI purchase and a storage corner for consistent water and control. Buying pre-mixed saltwater removes the mess but adds recurring trips, and you should still check its salinity before it goes in.
Cycle the Tank and Wait for the Tests
The nitrogen cycle is the biological filter. Fish waste and decaying food release ammonia, which is toxic. Bacteria colonize your rock and media and convert ammonia to nitrite, and a second group converts nitrite to nitrate, which is far less harmful and is removed by water changes and by algae and plant growth.
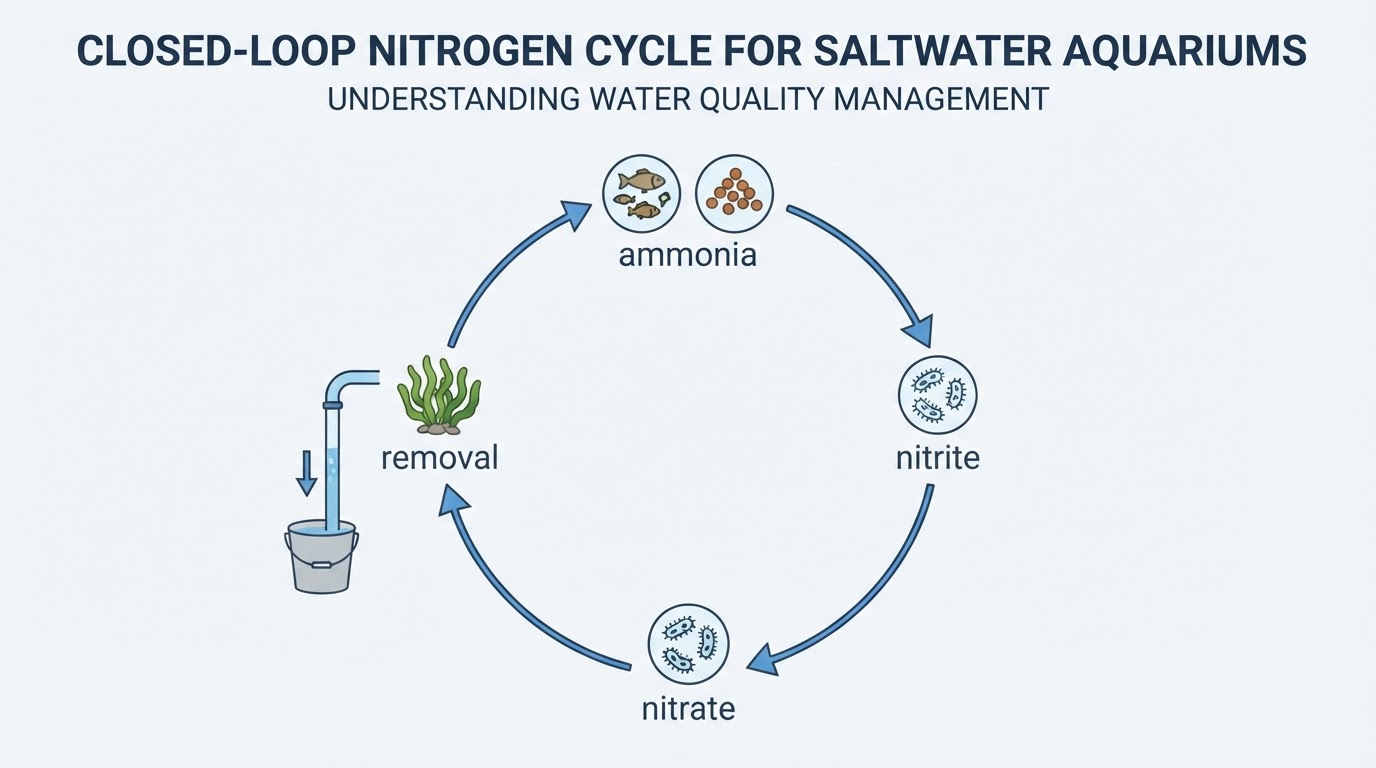
Cycle phases look roughly like this:
Phase | What the tests show | What to do |
|---|---|---|
First days | Ammonia appears from the starter source | Nothing. Do not add livestock |
Week one to three | Ammonia falls, nitrite rises | Keep testing daily or every other day |
Week two to six | Nitrite falls, nitrate climbs | Prepare for a water change |
Endpoint | Ammonia and nitrite at zero, nitrate readable | Do a water change, then stock slowly |
Timelines vary with temperature, surface area, how the rock was prepared, and which bacteria product you used. Bottled bacteria can shorten the wait, but it does not replace testing, and it does not let you skip the endpoint.
A cycling checkpoint you can trust: add an ammonia source, then confirm that ammonia and nitrite both return to zero within a day for three consecutive days, with nitrate rising in between. Only then is the tank ready for its first animal.
Two shortcuts to avoid. Do not use fish to cycle a tank, because ammonia damages their gills. And do not add a cleanup crew to "help" a tank that still reads ammonia, because invertebrates are less tolerant than fish, not more.
Live Rock and Sand Are Filtration, Not Just Decoration
Rock and sand give nitrifying bacteria the surface area they need, so they are part of the filter, not a backdrop. Rock also provides structure, hiding places, and territory boundaries that reduce aggression.
Cured live rock arrives with bacteria and other life already on it, so it can shorten a cycle. It can also bring unwanted hitchhikers: nuisance algae, bristleworms, crabs, and occasional pests. Inspect it, and be ready to remove what you did not ask for.
Dry rock starts clean and costs less, but it has no biology yet, so the cycle takes longer and you must seed it with bacteria. It is the more predictable choice for a first tank if you are patient.
Sand has two jobs: surface area and appearance. A thin layer of an inch or two is easy to siphon and keeps debris from collecting. A deep sand bed creates low-oxygen zones that process nitrate, but it needs the right grain size and years of stability, so it is not a beginner's first project.
Build the aquascape with two practical goals: open swimming space in front, and access to the glass for cleaning. Rock stacked against the front pane is a maintenance problem you will fight every week.
Stock in the Order the Bacteria Can Follow
Add livestock in the order the bacteria can follow, not the order you like the fish. Every new animal adds waste, and the bacterial population needs days to weeks to catch up, which is why "one at a time" is the rule that protects the tank.
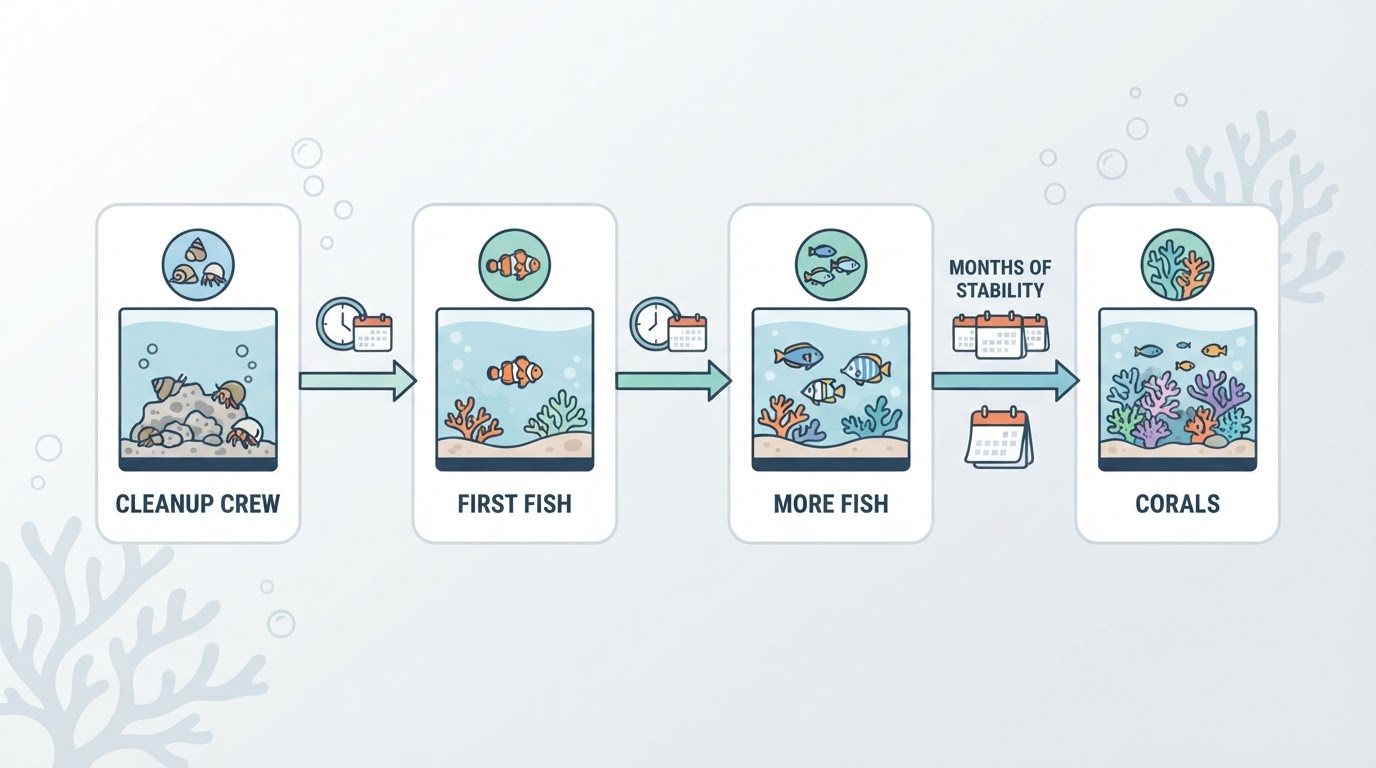
Stage | What goes in | Why this order |
|---|---|---|
After cycling | Snails and a few small hermits | They eat algae and detritus without adding much waste |
Two to four weeks later | One hardy fish, quarantined | First vertebrate load, so bacteria adapt to a small increase |
Then, one at a time | Additional peaceful fish, four to six weeks apart | Each addition is a controlled load increase |
After three to six months of stability | Shrimp, then easy corals | Invertebrates and corals need steady parameters, not a new tank |
Choose fish by adult size and swimming space, not by what looks small in the store. A fish that grows to a foot does not belong in a 40-gallon tank, and active swimmers need length. Add the most territorial fish last, so the more peaceful ones get established first.
Quarantine every fish for several weeks before it enters the display. It feels slow the first time and saves the whole tank the first time it matters.
Keep a Maintenance Routine You Will Actually Run
Daily, in a couple of minutes: check the temperature, check that the top-off is working, empty or check the skimmer cup, and look at every fish. Behavior is the earliest signal that something is wrong.
Weekly: change 10 to 20 percent of the water with matched salinity and temperature, clean the glass, rinse or replace mechanical media, and test alkalinity and nitrate. Test ammonia and nitrite whenever an animal looks off or something dies.
Monthly: clean the return pump and powerhead, inspect the heater and its cords, replace chemical media, and recalibrate the refractometer.
Quarterly: check the RO/DI resin and membrane with a TDS meter, replace expired test reagents, and compare your stocking plan with what is actually growing.
Keep a log. Salinity, temperature, alkalinity, nitrate, water changes, additions, and anything you dosed. When something goes wrong, the log is the only way to know what changed.
Plan the Budget by Category, Not by Guess
You do not need exact prices to build a realistic budget. You need the categories, because the categories are where first-time costs hide.
One-time setup: tank and stand, filtration and flow, lighting, heating and temperature control, rock and sand, test kits and a refractometer, RO/DI unit and storage containers, quarantine setup, and the first animals.
Ongoing: salt mix, RO/DI filters and resin, mechanical and chemical media, test reagents, electricity, replacement parts, and livestock.
Two cost drivers matter more than any other choice. Reef lighting and dosing push a setup well past a fish-only build, and a larger tank multiplies lighting, salt, water, and electricity together. Buying used can cut the hardware cost, but inspect the seams, test the pump, and assume the heater and test kits need replacing.
Before you buy anything, build a line-item sheet and price it locally, including the items people forget: water storage containers, a spare heater, a second powerhead, and a quarantine tank. If the recurring column is uncomfortable, the tank is too big.
Common Beginner Questions
How long before the first fish?
Plan on the cycle taking two to six weeks, then add quarantine time for the fish itself. A tank that reads zero ammonia and zero nitrite is ready for a cleanup crew; a quarantined hardy fish comes after that.
Can I use tap water?
It is the weakest starting point. Tap water varies by source and season and can carry nitrate, phosphate, and metals that feed algae. RO/DI water removes that variable, which is why it is on the must-have list.
Do I need a sump and a skimmer?
Neither is mandatory. A sump makes maintenance and equipment access easier, and a skimmer removes organic material before it decays, but a well-maintained AIO tank can run without one. What you cannot skip is biological filtration, water changes, and testing.
Why did my salinity go up when nothing else changed?
Almost always top-off. Water evaporates and leaves salt behind, so replacing evaporation with saltwater concentrates the tank. Top off with fresh RO/DI water, and keep the water level marked so you notice the change.
Is a nano tank cheaper to start?
The tank and equipment are often cheaper, but the margin for error is much smaller, and correcting a mistake costs time and livestock. A small tank is a good second tank, not a forgiving first one.
How often should I test?
Alkalinity and nitrate weekly, ammonia and nitrite whenever something looks wrong, and salinity at every top-off check until you trust the system. A short test schedule you actually follow beats an ambitious one you skip.
The Completion Standard for Your First Tank
Treat the first tank as finished when all of these are true at the same time:
- Ammonia and nitrite read zero for three consecutive days after an ammonia dose, with nitrate present.
- Salinity holds at your target for a week with top-off running, and temperature stays inside a two-degree band.
- Every fish has been through quarantine, and the newest addition has been in the display for at least four weeks without symptoms.
- Your weekly routine has run four times in a row at the volume you planned, not the volume you hoped for.
If one of those is not true, you are still in setup. That is normal. The aquarists who keep tanks for years are not the ones who stocked fastest; they are the ones who let the tests decide when the next step happened.