Start With 3 to 5 Days as a Starting Example, Then Watch the Filter
Bulk Reef Supply's mechanical-media guide says that, depending on density and pore size, filter pads need to be changed out quite often, "usually, every 3-5 days give or take." Its summary of fine disposable media is more specific: filter floss often needs swapping every three to five days (Aquarium Filter Media Explained). That is the source's common starting example for fine disposable media. It is not a statement about every reef system, and it is not a guarantee that any particular filter can safely go five days.
The same window is a reasonable first guess for aquarium filter pads of similar fineness, and for saltwater filter floss in a sock, cup or rear chamber. The interval then moves because the loading moves. Pore size, stocking, feeding, the amount of rock and sand shedding fines, and how much of the tray the floss actually covers all change how fast the mat blinds over. A fine pad in a heavily fed system can look tired well before day three. A looser mat in a lightly loaded reef may still pass water cleanly on day five. That is why the calendar only starts the routine; inspection decides the actual change.
There is no single hard safe maximum that applies to every filter. A coarse pad, a large tray, a light bioload and a low-flow pump are a different situation from a dense pad in a small chamber under heavy feeding. Treat any day count, including the three-to-five-day example, as a starting hypothesis to test against the filter's behaviour.
There is a practical reason not to stretch the interval once the media is loaded. BRS notes that when mechanical media is left in place, the waste it has collected is not removed from the water, and bacteria get a chance to break it down. Fine floss is the part of the filter you discard precisely because it holds that material.
Treat Flow, Level and Bypass as Clues, Not Proof
What a daily check looks like
While the routine is new, inspect the filter every day at roughly the same time. Three observations do most of the work.
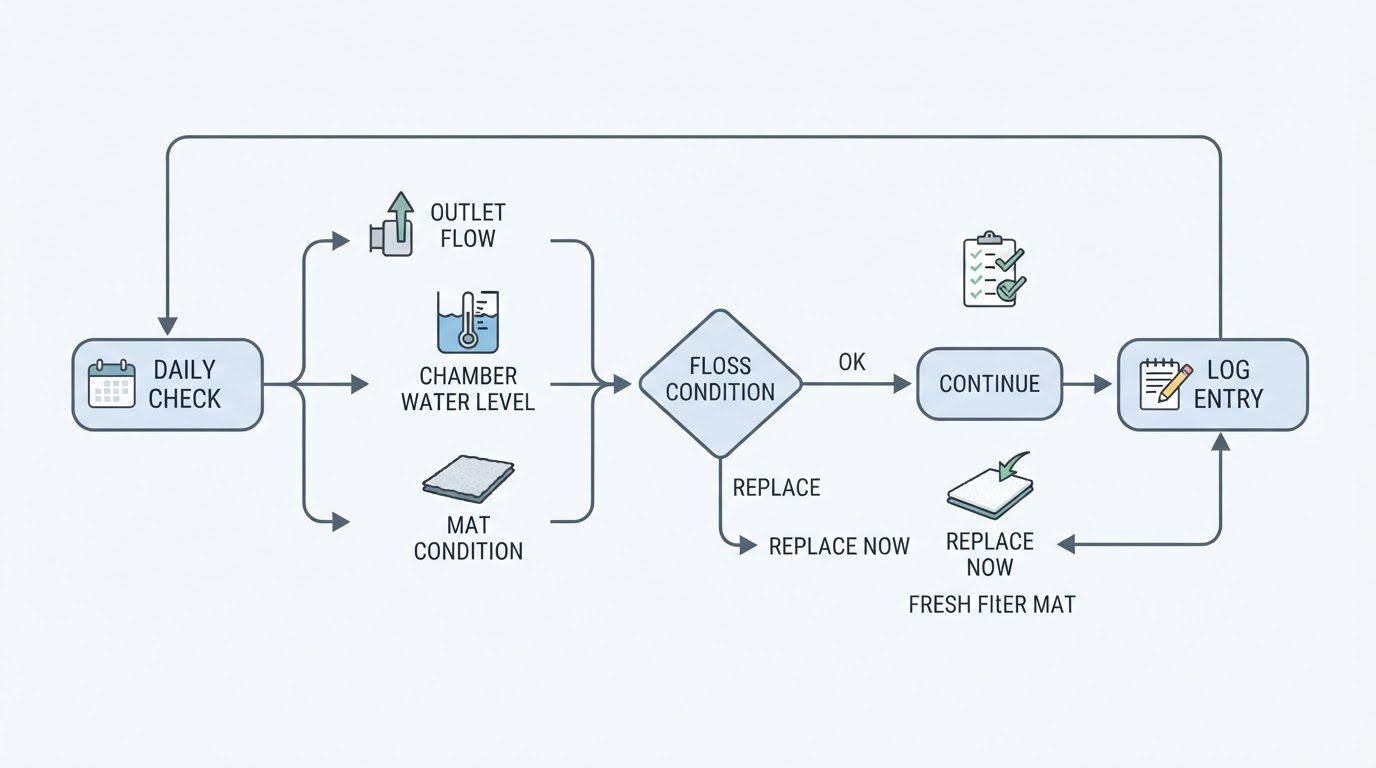
Flow at the outlet. Compare the return or filter outlet with what you saw immediately after the last floss change. A visible drop in flow is a clue worth investigating.
Water level in the filter chamber. In a sump or rear chamber, water backing up behind the floss can raise the level in that compartment before the display looks any different. Note the level when the floss is fresh so you have a reference.
The mat itself. Look for a collapsed or compacted pad, a hole or channel worn through the middle, and water spilling over an edge or around the sides instead of passing through the material.
None of these observations proves that the floss caused the change. A flow drop or a rising chamber level is consistent with a loaded mat, but the same clues can come from a restricted outlet, a clogged sponge, a dirty impeller, a partly closed valve or a failing pump. Bypass can come from poor fit, a collapsed pad or a damaged holder rather than from the media being old. Treat each reading as a reason to inspect the loading and fit first, then look further if the clue does not clear.
Water level deserves particular care. Rising water in a filter chamber is an observation, not a diagnosis, and an overflowing chamber or a pump running near dry is a safety problem rather than a maintenance interval question. If water is escaping uncontrolled, or a pump or heater may run dry, stop and follow the equipment's own safety procedure. Do not simply let the system run normally while water is leaving the system or equipment is at risk. Safety and the exact manual come first. The separation of water level, outlet restriction and foam change in our guide to protein skimmer overflow applies here too, but only after the immediate risk is controlled.
When the clues point to a loaded mat, check how the floss is sitting and replace clogged disposable floss as appropriate. If flow or chamber level is still abnormal after a correctly fitted fresh piece is in place, investigate the other possibilities: outlet restriction, clogged sponges, impeller condition, valve position and pump performance.
Replace the floss sooner, rather than waiting for the scheduled day, if flow has dropped noticeably, the chamber level has climbed above your fresh-floss reference, or water is finding a path around the mat. Those are reasons to inspect and act, not proof on their own that the floss was the cause.
A Repeatable Replacement Routine
The steps
The routine below keeps the order safe: decide and prepare, isolate per the manual if needed, fit the media, restart per the manual, then check the result.
- Decide and prepare. Decide whether this is a routine change or a response to a flow, level or bypass clue. Cut spare floss to fit the holder the filter maker specifies, and keep the pieces dry and clean near the tank.
- Follow the manual to isolate as needed, before touching the media. Use the exact procedure for your filter, pump or sump to isolate flow before you remove or replace floss. Some setups can be serviced without a blanket shutdown, for example by closing a valve or working in a chamber the maker designed for service. Do not assume every pump must be switched off, and do not assume you can skip isolation either.
- Fit the correct aquarium floss. Remove the loaded media and seat a piece of the type and size the maker specifies. It should cover the full width and depth of the holder and sit flat so water has to pass through it. There is no universal packing thickness.
- Restart according to the manual. Follow the required restart sequence for your model: valves, priming, water level and any step the maker lists. Never start a pump or heater dry.
- Check operation. Compare outlet flow and chamber level with your fresh-floss reference, and confirm the new mat is fully seated with no path around it. If either check is still abnormal after a correct fresh piece, investigate other restrictions and the pump rather than changing floss again.
- Log the cycle. Record the date, how many days the previous piece lasted and how loaded it looked. Over several cycles, those notes show how your arrangement actually behaves.
The finish line for a change
A change is complete when the new mat is fully seated, outlet flow and chamber level are close to the reference you recorded with fresh floss, and the filter is running according to its manual. That reference is a useful comparison point, not an exact guaranteed flow value; readings can drift with filter condition, water level and pump behaviour. If either check is still off after a correctly fitted fresh piece goes in, stop changing floss and look elsewhere: a restricted outlet, a clogged sponge, a dirty impeller, a valve position or a failing pump can all look like a floss problem.
What you see | What it may indicate | What to do next |
|---|---|---|
Outlet flow clearly weaker than the fresh-floss reference | A loading mat is one possibility; an outlet restriction, dirty impeller or pump problem is another | Check loading and fit, replace clogged disposable floss if appropriate, then investigate other restrictions and the pump if flow stays low |
Chamber level above the fresh-floss reference | Water backing up behind the floss is one possibility; a downstream restriction is another | Control any uncontrolled overflow first, then check compaction, fit and other restrictions before repeating a change |
Water passing around or over the mat | Bypass from poor fit, a collapsed pad or a damaged holder | Reseat or resize the piece; do not shorten the schedule to compensate |
Mat collapsed, torn or channelled | The material has lost its structure | Replace it and check that the holder is not crushing it |
Fit the Floss to the Tray, Not the Other Way Around
Correct fit matters as much as timing. Use the type and size of aquarium floss the filter maker specifies, cut it to cover the full width and depth of the holder, and seat it flat so water has to pass through the material. A piece that is too small leaves gaps at the edges, and water takes the easy path around it. A piece that is forced in as a thick wad can crush the fibers, restrict flow and collapse into a solid plug.
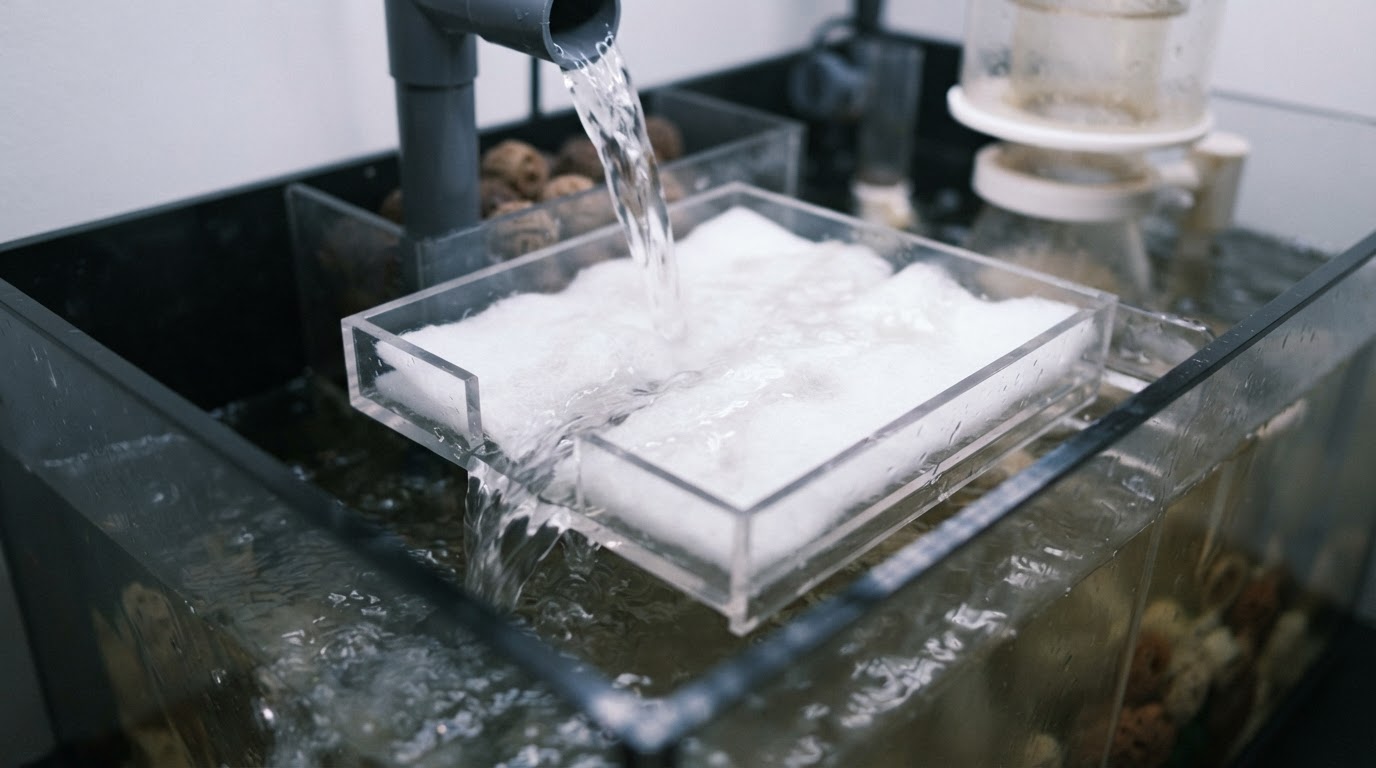
There is no universal thickness to aim for. Some holders are designed for a thin polishing pad, others for a loose handful of floss in a cup or sock. Follow the maker's guidance for your model, and change the arrangement only when you understand how it affects flow.
Shut Down and Restart by the Equipment Manual
Floss changes sit inside a live system, so isolation and restart belong to the equipment, not to a generic checklist. Use the exact procedure in your filter, pump or sump manual. Some setups permit service without a blanket shutdown; others require a specific sequence of valves, pump stops and restarts. Do not switch off every pump as a reflex, and do not skip a required isolation step because a similar filter allowed it.
A heater has its own conditions. Do not assume that unplugging a hot heater makes it immediately safe to lift out of the water. Follow the model's instructions for unplugging, allowing it to cool, maintaining the required water level and restarting it before you expose the heater. If the manual requires the heater to stay submerged, keep the water at that depth or use the maker's removal procedure. Never let a return pump or heater run dry, and never dry-run equipment to see what happens.
Keep Biological Media Out of the Disposable Cycle
Fine floss is a disposable mechanical material. BRS describes fine mechanical media such as floss and felt polishing pads as disposable because they cannot be effectively rinsed clean, while coarser sponges and filter socks can be rinsed and reused.
Biological media is a different job entirely. Ceramic media, bio-balls, live rock and sand house the bacteria that process waste, and they should not be placed on the disposable-floss schedule or replaced all at once. Replacing a piece of floss removes what the floss caught; it is not a reason to strip the system's biological filtration.
That does not mean a floss change is guaranteed to be harmless. Keep the biological media untouched, avoid deep-cleaning everything in the same session, and watch the tank for a few days after any maintenance that disturbs more than the floss.
What This Routine Does Not Do
Changing floss often is waste removal, not a nutrient cure. If nitrate or phosphate is high, the floss schedule is only one input; feeding, stocking, export methods and test results all belong in that conversation.
This routine is also not a universal schedule and not a promise of zero nutrients or instant algae control. A three-day change does not prove that three days is always safe for every filter, and daily inspection while you are learning the setup is a proposed routine, not evidence that any particular interval is safe or that floss will solve a nutrient problem. Do not wash disposable fine floss indefinitely to save money, and do not replace all of your biological media because the floss interval was short. The aim is narrower: remove trapped waste on a rhythm your filter can tolerate, and let the checks set the pace.
The Short Version
Bulk Reef Supply's common starting example for fine disposable filter floss is three to five days, but treat that as a specialist starting point rather than a safe maximum. Inspect flow, chamber level and mat condition every day while the routine is new, treat each reading as a clue rather than proof, and follow the exact manual for isolation, media fit and restart. Check for other restrictions and pump problems if a fresh, correctly fitted piece does not restore normal operation, log how long each piece lasts, and keep biological media on its own schedule. Over a few cycles, your own notes become a better guide than any single day count.